Tag Archives: custom

How to Customize T-Shirts

Customize t-shirts

Custom T-Shirt Printing

One of the most popular, and easiest, ways to express yourself is through your clothing. And, what says expression better than a custom designed T-Shirt.  A popular fad during the 1980s, heat-pressed t-shirts bearing glittered images of television personalities and rock stars may not be the “in” thing today – but the popularity of personalized t-shirts has not really declined.

Today, it’s more common to see screen-printed t-shirts bearing a popular cartoon character with some catchy phrase reflecting the personality of the wearer.  Take a look in the halls of nearly any high school, and you will be bombarded with personality shirts.  This is a great trend for the younger crowd, but what about young professionals?

It is becoming more common than ever to see company representatives in t-shirts and golf shirts bearing the embroidered logo of their employer.  Often, these shirts are presented to the company for use on casual dress days or company events.  Promotional companies have built tremendous corporate customer bases through the popularity of these embroidered shirts.

Similar to the process used in the glitter shirts of the 80s is the process of dye sublimation, which allows for heat transfer of a detailed and multicolored image with more accuracy and less change of fading than a standard ironed-on design.  The process of dye-sublimation requires specific materials and equipment, and it is most commonly done by professionals. However with the right tools and techniques, any of the four methods of designing custom t-shirts can be done by just about anyone with a little time and creativity.

Heat Transfer

Heat transfer, or iron-on, t-shirt design is perhaps the easiest and least expensive method for creating custom t-shirts for yourself, your friends or your family.  Commercial heat-press t-shirt designers generally use an industrial bed-style heat press in order to apply the customer’s choice of design to a t-shirt.  The designs are printed onto a special paper, which allows the image to separate from the backing paper when the design is pressed at a high temperature.

In contrast to the high costs of industrial heat presses, the home iron actually works just as well for most people interested in the world of t-shirt design.  And, just about anyone with a little creativity can create their own transfer designs with a home computer and a color printer.

The average cost for a professional heat press is around $500.  There are a wide variety of options for those interested in purchasing this equipment, including different size machines, different temperature settings and different styles and colors.  Most people could easily find an industrial heat press that meets their needs for well under $1,000.  While this might sound like a pricey endeavor, it is beneficial to think of the return on investment.  Generally, a custom printed t-shirt at the local mall will cost between $15 and $30.  The price is 10% higher, on average, when the t-shirt is printed at or near a tourist attraction.  Considering the popularity of custom t-shirts, an entrepreneur could easily recover the cost of the press in as little as one month.

For heat pressing, the press is the most crucial and most expensive piece of equipment. However, many t-shirt shops are now purchasing computer systems and printers which allow for complete customization and eliminate the need to purchase and store large numbers of stock designs. With the aid of computer software and image packages, a t-shirt designer can allow customers to browse thousands of customizable images which can be quickly printed and pressed onto the t-shirt of their choosing.

The cost of the computer, printer and software necessary to offer such a wide selection to customers depends more on the desired technology and individual preferences of the purchaser. A decent computer system, complete with a color printer, can cost as little as $600 and as much as several thousand dollars.  Many software packages are available, and the software ranges in price from inexpensive, with less customization options, to also in the several thousand dollar range.  Generally, the more expensive software offers the most customization options for the t-shirt designs provided.  The cost can seem daunting, however in order to consider the benefits it is necessary to explore the alternatives.

Take a look at the offerings of any t-shirt kiosk in your local mall.  You will see that there are usually a few hundred pre-printed designs for customers to choose from.  These designs are not customizable in most cases, and they are definitely not very unique.  What you may not realize is that the shop owner pays around $1 per copy of each image offered.  A new t-shirt shop owner hoping to compete in the custom shirt market will need to purchase a large variety of designs in varying quantities.  If you were to purchase 10 copies of 100 designs, you are already spending $1,000 for a minimal supply of designs.  And, chances are that you might choose to expand your offerings. This would leave you with the already purchased designs, in addition to requiring the purchase of new and exciting designs when they become available.  Because trends and fads come and go, the amount of research and background work necessary could easily be eliminated with the use of software offering quarterly design updates.

Honestly, the selection of equipment depends on the desire of the t-shirt printer.  If you intend to generate repeat business, you will need to stay current with your offerings – and this is true with both stock options and customizable options.

Embroidered T-Shirts

One of the most popular corporate promotions and advertising methods today is the embroidered t-shirt, bearing a high contrast logo on a t-shirt.  Most companies distribute these shirts to employees for casual days and corporate picnics and other events.  Although t-shirts are not generally thought of as corporate attire, no one wants to visit an amusement park wearing a suit and tie.
The corporate logo t-shirt generally requires little customization, because the company provides the logo to the producing company.  But, unlike handcraft embroidery the threadwork needs to be done using an embroidery machine.  Home embroiderers who want to create custom shirts for friends and family members will sometimes choose hand-embroidery as the production method. However, duplication is nearly impossible and can be extremely time consuming.  For this reason, home embroidery machines are gaining popularity at fabric shops everywhere.

Generally, a home embroidery machine with a variety of template designs costs around $500.  The options for these machines are limited, and unless they come with software and connections for a home computer, the number of designs that can be produced is quite limited.  Of course, there are always more templates available for purchase.  Considering that the price of new templates adds up over time, it might be better for the home embroiderer to spend around $1,000 for a machine that will work with a computer, similar to the way a printer works.  With this type of machine, the embroiderer can connect their machine to their computer, select a standard design, or design a custom image to be embroidered onto their t-shirt.

Professional promotional companies that provide mass quantities of embroidered shirts will generally need to spend around $5,000 for the equipment necessary to mass produce embroidered t-shirts at a relatively fast rate.  Of course, these machines also generally require computer systems and software.  The additional cost can be as low as $600 and as much as several thousand dollars.  Most would agree that the price is right, considering the average cost of $20 for a custom embroidered shirt.

Embroidery has always been a popular adornment for clothing.  Looking back to ancient Rome, it is evident that the more detailed a robe or tunic, the more important the wearer was to the society.  Intricate designs were embroidered by hand onto silk robes and other pieces of clothing in order to customize them for the wearer.  While embroidery no longer represents social status, the appreciation for fine embroidered designs is just as common today as it was then.

Machine embroidery has also developed over time. Embroidery machines gained popularity during the 1990s, with a few machines to choose from. Companies familiar to tailors, including Brother and Toyota, offered the first commercial and home embroidery machines.  Technology is constantly evolving, and today’s machines are much more sophisticated than those produced just a decade ago.  While the original designs required machine specific templates, the advent of developing computer software now allows the t-shirt designer to design their own images, and to convert it to a standard format for use by the embroidery machine of their choosing.  Standardization has also opened up the availability of millions of designs for embroiderers.

The field of t-shirt embroidery is gaining in popularity among designers and shirt wearers alike.  And, technological developments continue to become available to embroiderers. This reduces the amount of time and the cost of production for each individual shirt.  The selection of the right equipment and software to meet your needs is an individual decision, and therefore it is important to explore the various options to find the best solution for your situation.

Screen Printing

The first screen printers lived in Japan, thousands of years ago. Evidence exists today in museums across the world, in the fine art galleries.  Most of the rare Japanese prints hanging in these galleries are early forms of screen printing.  Today, we see screen printed items nearly everywhere we look.  Walking down a city street, you will see screen printed signs, bumper stickers and billboards. But the most commonly screen printed item is the t-shirt.

Industrial screen printing is one of the least expensive methods for mass-production of printed t-shirts.  A walk through any department store will place you in a sea of shirts produced in this way.  There are many methods for production, but the original method used by the Japanese still provides the basic principle used in screening.

The technique of screen printing utilizes some type of frame, which will align a template and the material onto which the design will appear.  The template is most commonly made of thick cellophane or another non-porous material.  Once the material and the template are locked into the frame, a thin layer of paint or ink is pulled across the template using a squeegee in order to guarantee an even distribution of the design.

The design options for screen printed shirts are much more limited than the designs used in embroidery and heat pressing.  However, they are often more interesting to the beholder.  Most of the time, these designs are printed in one color – possibly as many as a handful of colors depending on the intricacy of the design.  It is easier for a commercial printer to produce multi-color designs than it is for an individual at home.

The design of the template for printing utilizes the idea of negative space, a concept unfamiliar to most people without an art or design background.  When creating the template, it is necessary to draw out the design which will appear on the shirt and then to use an Exacto knife to cut out the inside of the desired design.  Thus, most people new to screen printing will choose to begin practicing with very basic designs.  Once the process of creating negative space becomes comfortable, designers can easily move to slightly more difficult patterns and images.  Professional artists who generate screen printing templates will often create multiple templates for the same design, one for each color to be printed in a particular order.  The ordering of the templates is crucial for multi-colored designs in order to produce the desired design as it was intended by the designer.

Most professionals who opt to screen print t-shirts will purchase equipment that can automatically cut out the desired design from the template material.  This process is very expensive, and so generally the produced templates will be utilized many times. This type of equipment is fairly expensive, and in order to generate a profit the designer will need to produce and sell many duplicate designs.

The home screen printer, who wants to create custom screen printed designs, will not need to purchase this expensive machinery so long as they have an eye for design and a steady hand.

Screen printed t-shirts are commonly worn by little league baseball teams, and school students who receive shirts for participating in events and activities.  Generally, the more shirts that are produced with a similar image, the cheaper the shirts will become.  For this reason, screen printing is often the method of choice when the t-shirts need to be identical.

Screen printed t-shirts make great gifts for friends and family members however remember that you will need to select a sturdy material for your shirt design templates so that they will last through multiple printings.  Practice makes perfect with this technique, so be sure to try printing your design on paper prior to locking that shirt into the frame.
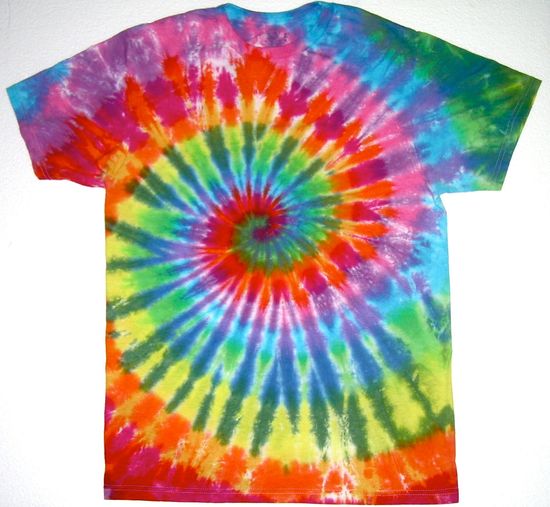
Dye Sublimation

Dye sublimation is a heat transfer process used for creating custom t-shirts, and although the process is more involved and requires specialty inks the process is quite popular.  Like iron-on heat transfer designs, designs printed with sublimation inks are transferred to t-shirts with the use of an iron or a heat press.

The difference between dye sublimation and iron-on transfers is that with dye sublimation, the fabric of the shirt is actually changed when it absorbs the sublimation ink.  This is in contract to the iron-on, which simply attaches to the shirt with a binding agent.  For this reason, shirts designed with dye sublimation tend to maintain their design through many more washings.

The process of dye sublimation includes printing a design onto heat transfer paper with special inks that evaporate to a gas-state when heat is applied.  The ink then attaches to the fiber of the fabric onto which it is being applied.  There is no change in the texture of the fabric, and the design is permanent.

One of the benefits of using this type of transfer process is that the design can be much more intricate than that of an embroidered t-shirt, a screen printed t-shirt or an iron on transfer.

Generally, the process involved will include a computer generated or scanned image that is printed with an ink jet printer on to sublimation transfer paper.  For the home crafter, the process is a bit involved because special ink is required. While some printer manufacturers make available sublimation ink cartridges, others do not.  For those that don’t have the option to use pre-filled cartridges, there are kits available for filling empty cartridges with a syringe.  The process is not extremely involved and is simple once you know the steps for filling the cartridges.

Once the design is printed onto the paper, it can be transferred with a hot iron or a flat heat press.  Generally, steam is not preferable and therefore it is best to turn off the steam setting on the iron prior to pressing the t-shirt.

The catch is that when you are selecting the t-shirt, you cannot just select any material.  Artificial fabrics, like polyester, work much better with this process than natural fibers like cotton.  This is because of the structure of the fibers, and their level of ink absorbency.  There are ways to coat a natural fabric with polyester in order to produce the desired transfer effect on the t-shirt, however it is probably easier to just purchase a polyester t-shirt from the beginning.

The process used in dye sublimation is much newer than other t-shirt transfer processes.  It was actually discovered by a French printer in the 1950s.  A printer realized that certain inks would vaporize and then solidify onto another fabric (or paper) when high heat was applied.  The process is quite common today in the printing industry.  However, because of the longevity of sublimation clothing manufacturers have also adopted the process.

Interestingly enough, the process of dye sublimation can also be used when screen printing a design. The difference between this type of screen printing and normal screen printing is that instead of applying ink and pulling it across the template with a squeegee, a layer of thin, transparent film is applied atop the template and then high heat is applied to transfer the design to the t-shirt.

Generally, the process of sublimation is difficult to master for the home crafter. However, once you practice and develop a technique it is very useful in t-shirt design.  Industrial t-shirt manufacturers commonly use this technique to create beautiful and unique t-shirts which outlast those created using other methods.

What Tie Dye Means

Tie dye

1. History of Tie Dye

Tie dye originated in different parts of the world and thus it doesn’t belong to one particular region. The history and various forms of tie dye that have been practiced in different countries are as follows:

Tie Dye in Ancient Times
Tie dye is believed to be a prehistoric product. The researches has shown that the ancient people had used tie dye by applying flower’s juices, plant’s juices, leaves, stones and other substances on their cloths. But they might have not been aware of the fact that it is actually dying; for them it was just a way to decorate their cloths.

Archeologists have found printed pieces of fabrics in various parts of India which shows that ancient dyers had tried to make patterns of colors on fabrics using various dyes. Even the mummies of Egypt were found wrapped in a dyed fabric. So, it may be possible that tie dye techniques travel from India to Egypt and then to other parts of the world.

Tie Dye in Persia
Persia’s history shows the existence of tie dye centuries before the birth of Christ. Persians used the threads of Safflower, which is a quick dissolving herb as their dye material. They used to crush it and dissolve it in water to dye their cotton fabrics into deep yellow shades.

Tie Dye in China
Chinese had been using tie dye since the sixth century. But it fully developed and spread all over China during the T’ang Dynasty (618AD – 906AD). Chinese tie dye is also called “zha ran” or “jiao xie”. The tie dye silks of this era were found at Astana and Khotan in the graveyards and at Sin Kiang on the Old Silk Road. One interesting fact is that not everyone was allowed to wear the tie dye cloths; only Priests and rich people were allowed to wear it. They even had set separate standard colors for all the social classes.

Chinese were aware of the technique of turning, folding and tying the fabric in such a way that when it was dipped; different parts of the cloth would be dyed. They used to extract their dyes from flowers, leaves, roots, blackberries, onion, indigo, sage, red cabbage, safflower etc. They used a special technique of tie dye called “ikat” in which the threads are dyed before weaving the cloth.

Tie Dye in India
Indian tie dye is probably the most famous form of tie dye. It is believed that tie dye in India started almost five thousand years ago and hence is the oldest one. Indians used tie dye on silk materials as cotton was not available there at that time. Tie dye was known as “Bandhana work”, “Bandhani” and “Bandhej” in India and was unique in its own way. The dyers used to grew the nails of their thumb and forefingers very long and use them to pick small points of the fabric to tie in shapes of small dots before dyeing it.

Tie Dye in Japan
Tie dye started in Japan during the Nara period (552AD – 794AD). Japanese tie dye known as “shibori” is one of the most famous forms of tie dye which is used to make various forms of designs on cloths for elaborating kimonos. Japanese used tie dye on both silk and cotton materials.

Tie Dye in Africa
Tie dye has been widely used in all the African countries, especially Nigeria. Africans used tie dye to make dotted designs on woolen cloths and to produce magnificent indigo-dyed fabrics. The modern form of African tie dye involves synthetic dyes and patterns.

Tie Dye in United States
Tie dye started in United States during 1920’s but fully bloomed in 1960’s when everyone was emphasizing individuality. Tie-dyed sheets were very commonly used as room dividers, tablecloths, curtains and wall hangings. Tie dye banners of silk and cotton were used as backdrops for the concerts.

It was the era of 1980 that changed the fate of tie dye and made it a very stylish, highly skilled and labor intensive form of art. Permanent dyes in bright and earth tones were invented which replaced the easily fade dyes.

2. What can you tie dye (products)/ Tie dye ideas.

Adding color to your clothes – old and new !

The colorful clothes originally popularized by the members of the hippie subculture in the sixties have really stood the test of time in terms of popularity through out the world and is currently a hot (and colorful) favorite in the United States.

The method used to color clothes as well as a host of accessories is called the Tie dye method, where clothes are tied, either with string or rubber bands into various attractive patterns. Then the clothes are dyed, either by submerging them in a dye bath or by squirting dye solution onto them.  Areas where the fabric is tied and in inner parts of folds, do not absorb dye, thus forming a pattern. This is also known as a resist technique (since the areas that are tied and the inner parts of folds resist dyeing). While the craft has been practiced in nearly every part of the world for hundreds of years, it probably began in ancient Asia and spread to Africa.

Many Americans who served in the Peace Corps in Africa during the 1960s learned tie dye designs from the native people, and on their return to the United States, they taught the craft to others.

Since each design is always different from any other and it is nearly impossible to predict the end result with absolute surety, the surprise forms the large part of the fun in its creation. Tie dyeing is a great way to give new life to an old or stained t-shirt, and recycling old clothes.

Natural fibers, such as 100% cotton are best suited for tie dye, but a combination of cotton and polyester can be used successfully.  There are thousands or designs which are used, very imaginatively on the items, the most common of which is a t-shirt, but you can dye just about anything (shirt, pants, socks, handkerchief, pillowcase, sheets, curtains, tablecloth, etc., in fact for the home and the entire family).

Below is a list of some of the items you can tie dye:
– For Him: T Shirts,  Scarves, Shirt, Trousers, Socks, Handkerchief, Neckties, bandana, Hoodie
– For Her: Yoga pants, Tee shirts, Socks, Underwears, Skirts, Tank tops, Hot Shorts, Capri pants, Pajamas, Kaftan
– For Home: Pillow case, Sheets, Curtains, Tablecloth , Napkins, Kitchen Mops, Tapestry wall hanging,  kitchen apron.
– For infants and toddlers: Rompers (long and short sleeves), Diaper covers, Body suit, Bib, Long sleeve lap dress, Booty pants set, Onesie

3. How to Tie Dye (tie dye) a Shirt (Tie Dye Detailed Instructions)

Tie dye is the most experimental and unpredictable form of art. You can never figure out its final outcome unless it is completely processed and dried. If you keep on trying your hand on tie dye, you will learn to create many different effects that you would not have otherwise even heard about. You can make a number of tie dye items such as colorful t-shirts, sheets, pillow covers, curtains etc. A detailed instruction on tie dyeing a T-Shirt is given below.

Items for Tie Dyeing
You’ll need various items ready in order to tie dye your t-shirt depending on the brand of your dye. Below is a list of some important supplies you may need:

– T-Shirt: The first thing you need is a t-shirt; just be sure that it is at least 60% cotton or another dye able fiber.
– Rubber Gloves: It will protect your hands from the dye and hot water.
– Large Container: A large container with a capacity to hold at least 3 gallons is needed for the mixing of the dye.
– Spray Bottles: It is used to apply the dye.
– Long-Handles Utensil: It is used to stir the dye.
– Sodium Carbonate: it is used to pre-treat the item you are tie dyeing.
– Rubber Bands: It will be used to tie up the item you are tie dyeing.
– Salt: it is used to make the darker colors even more vibrant.
– Plastic Bag: It is used to keep the dyed item in it for approximately 24 hours.
– Newspaper and/or Plastic Garbage Bag: It is used to protect your work area.
– Rags, Paper Towels, Cleanser: It is used for the cleaning of utensils and work area.

Remember, the above listed items are just to give you an idea of what you may need. You should read the instructions given by the manufacturer of the particular dye you may use to know the exact items needed for tie dyeing.

Instructions to Tie Dye a T-Shirt
Tie dying is a very simple process. Some of the instructions may vary depending on the brand on the dye but the basic instructions are as follows:

– Place the T-Shirt – Firstly, place the t-shirt out flat.
– Tie the T-Shirt – Now tie the t-shirt using rubber bands or strings in spirals, accordion folds or sunbursts. These techniques of tying are given below:
Spirals – Grab the t-shirt at the center of the spiral and make a tight bundle by twisting it clockwise. Now tie    the t-shirt with rubber bands and make several parts of pie shape. Spiral Tying is dyed by filling different       colors in the pie shapes while turning the t-shirt over and repeat the same process on both sides.
Accordion Folds – This tie is used if you want to make band of colors in different directions. It may resemble      this VVVVVVVVV. This type of tie is dyed by folding the stripe, binding it with rubber bands and then dyeing in     strips across the folds.
Sunbursts – Hold the t-shirt from the center of the sun burst and make folds that emerge from that point. Now       bind it with rubber bands and dye in strips across the folds.
– Prepare the Dye – Next mix your dye according to the manufacturer’s directions. But if you want to be really accurate you should measure the dye by weight and use the proportions of dye accordingly.
– Pre-treat the T-Shirt – Some brands of dyes needs you to wash and spin the t-shirt and then soak it in soda ash for at least 30 minutes and with others you have to simply dip it in hot water.
– Start Dyeing – Dye the t-shirt now. It is recommended to start with the lightest color incase of using many colors. Again follow the manufacturer’s direction. You may need to rinse or wait between colors. Some dyes need you to rinse immediately and others may need to sit it in some plastic bag for at least 24 hours.
– Final Touch – Ok now rinse the t-shirt in cold water and wash it for about 2-3 times to remove excess dye. You may dry it in a dryer or simply hang it to dry itself.

Again, the above mentioned instructions are basic guidelines to tie dye but the exact instructions may vary depending on the brand of the dye you are using. Therefore, you should read all the instructions and precautions given by the manufacturer very carefully. Remember, no two t-shirts will ever show the same results, no matter how hard you try! So be creative and you’ll be having fun in it.

4. Tie Dye Tips

No doubt tie dyeing is fun to do and it’ll become even more valuable and interesting if you follow the below guidelines and tips.

– Cover the Work Area: You should cover your work area by laying down some newspaper or garbage bags.
Wear Gloves: Always remember to protect your hands from hot water and stains by wearing rubber gloves while dyeing.
– Try it Outside: It is recommended to tie dye your item outside if the weather is good.
– Pre-Wash: You should wash the material before dyeing in order to remove anything it may have gotten on it from the manufacturer.
– Follow the Instructions: It is highly recommended that you follow the instructions given by the manufacturer of that particular dye while tie dyeing your fabric.
– No Softeners: No softeners or fabric sheets should be used during pre washing.
– Recommended Fabric: Cotton fabrics and almost all other nature fibers shows best results after tie dyeing.
– Hot Water: Dye should be mixed using hot water.
– Pre Decide: The design and colors you want on your fabric should be pre decided.
– Watch your Color Combination: You should remember the color wheel and apply the colors that come next to each other in the start like red – orange – yellow – green – blue etc
– Depth of Color: The depth of color is determined by the length of time the dye is used.
– Rinse Cautiously: The tie dye item should be rinse with warm water first and then with cold water.
– Wash Carefully: You should wash the tie dye products very carefully. Most of the tie dye item should be washed with cold water.
– Let it Dry: You should let your item dry flat.
– Wash the Containers: After dyeing all containers should be washed with hot water and cleanser or soap.

5. Where can you buy tie dye supplies (online and off)

Acquiring those Tie Dye Clothes – It’s easier than you think!

If you think buying the colorful, attractive tie dye items is tough in the United States, think again. There are innumerable websites on tie dye selling stuff on line. They accept mail orders and even payment can be made with almost all major credit cards. There are wide varieties of designs, colors, patterns which are displayed for items which range from personal casual wear to kids/infant wear to household items. And if you wish to learn “how to do”, there is equally large number of websites teaching you the art of tie dye.

Ordering is simple; where you have to specify your design and size and there you are…goods are delivered at your doorstep. Of course there are shops as well who specialize in tie dye wears.

Here are a few websites which you can visit for your shopping of tie dye goods:

Wildflowerdyes gives you access to an exhaustive range of clothes and accessories with vivid colors and designs which is surely to make an impact wherever and whenever you wear them.

EBay is a huge market of tie dye products.

Contact Richard@tie-dyes.com for fabulous tie dye products.

TrueTieDye is available offline at below address:
742B Maniton Avenue #3,
Maniton Springs,
CO 80829, USA.
Ph. (800) 796 5723.

TieDyeQueen offers online as well as offline supplies of tie dye products. You can contact the owner, Karen at Karen@TieDyeQueen.com. Their can be found offline at below address:
3511 Sierra Madre,
Columbia/Missouri 65203.
Ph. (573) 442 5791.

You can have custom-made tie dye apparels at dyemaster.net. Products of this company are also available offline at the following stores :
Headquarters
125E, 7th Street,
Tempe, Arizona .
Ph: (602) 956 5093.

Strawberry Fields
304E Main Street,
Salem, VA 24153.
Ph: (540) 375 6550.

You can see an excellent collection of tie dye products for the entire family as well as for your home just by logging on to mamashome.com.

Mamatiedye.com is yet another site which is as refreshing as the summer setting in and the vibrant colors offered with a wide range of items is bound to make your on line shopping memorable.