Tag Archives: how-to

Hem

How to Hem a Pair of Pants

Hem

How many times have you found the perfect pair of pants fit wise only to be discouraged because you realize that they are way too long? Well that should never deter you from buying those pants and if you know how to hem a pair of pants, it won’t. Learning how to hem pants gives you a distinct advantage every time you go shopping for clothes because you never have to worry about the length of pants and can instead focus on the actual fit of the pants. The best part is it is not as hard as you might think.

Learning to hem opens up a whole new world of options for you when it comes to fashion. Here are the steps to hemming a pair of pants:

1. Remove existing hem: If there is an existing hem then you will want to remove the threads and then iron where the old hem was to remove the creases.
2. Mark the new hem: Try on the pants with a pair of shoes that you will likely be wearing with the pants and then use tailor’s chalk to mark where you will want the new hem to be. Do this evenly on each side and then pin the new hem in place.
3. Make hem creases: Once the new hem is pinned in place you will iron once again but this time to create a crease where the new hem will reside. After ironing, try on the pants again and be sure that you will be pleased with the fit because the next step requires cutting to take place and there is no turning back after that.
4. Trim the fat: Trim all the excess material away using scissors and stay as straight as possible to achieve an even cut. You will want to leave a hem allowance of about one to two inches for dress pants and one inch for a top stitched hem.
5. Define new creases: Now using a press cloth to avoid hurting the fabric, press the hem lines in good with your iron.
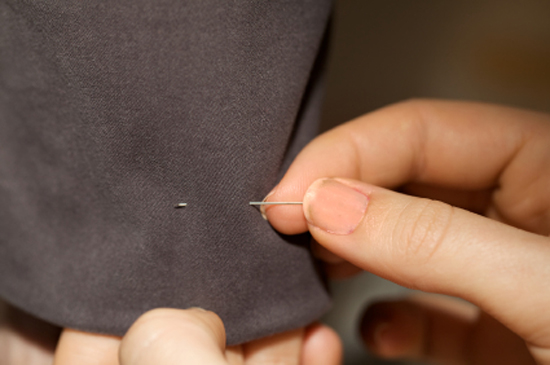
6. Sew the new hem: In this step you will want to try to mimic the original hem. If the fabric is really bulky you can use seem tape to help you with the material. Once you know where you will be sewing use a sewing machine or break out the thread and needle and go to town.
7. Press one more time: After sewing the hem into place give the hem one last pressing with the iron and you should be all set.

The entire process should take you about an hour but realize when you first set out to do this it may be just a bit longer than that. But once you get the process down you will never again have to put those cute pants back on the rack simply because they are too long. While there may be many reasons not to buy a pair of pants, the length being too long should never be one of them.

Shorten t-shirt

How To Shorten A T-Shirt

Shorten t-shirt

Have you ever found the absolute perfect T-shirt but there was just one little thing wrong with it?  Often we come across shirts we absolutely love but they are in the wrong color, wrong size, wrong style, too short, too long, too tight or too loose. In fact there are endless things that could make a T-shirt almost perfect but not quite. If you happen across one of those almost perfect T-shirts that are simply too long, relax because it is the absolute easiest thing to fix. In no time, you can have the perfect T-shirt. Just follow these simple instructions on how to shorten a T-shirt.

1.    Pre-wash and dry the T-shirt. Alterations are never accurate unless the item has been laundered first. Even if the tag states that the T-shirt is pre-shrunk, you still need to wash and dry it at home to be sure that it has indeed reached its actual, final consumer size.
2.    After trying on the T-shirt and measuring carefully, cut the hem of the T-shirt to approximately 1 inch – 1 ½ inches longer than the desired ideal length.
3.    Use a serger machine to protect the cut ends of the shirt with an overlock stitch so they do not unravel or roll up.
4.    Fold the remaining end of the T-shirt to the desired size in order to create the new hem and then pin it, to hold it in place.
5.    Iron the seam to be sure it lays flat and to keep it in place when you actually start sewing.
6.    With care, line the T-shirt up on a sewing machine and simply sew the hem in place. You may also do so by hand, but machine stitchery is best.

Shortening an off-the-rack T-shirt to make it the perfect fit for you is not the only option you have. Of course you could buy it as is and belt it to wear as a dress or use it to sleep in, although these are not the ideal solutions either. If you happen to find an almost perfect T-shirt, there is another alternative to the somewhat timely process of shortening it. You can simply custom order a T-shirt like it that is indeed exactly what you want. Make a note of what it is that makes the T-shirt you have found so perfect, apart from its length, and then order it exactly as you want it.

Roll-up sleeves

How to Roll Up Your Sleeves Guide

Roll-up sleeves

Have you ever wondered if rolling up your sleeves makes you look like a hillbilly? Is it even acceptable in a business setting? Is there a right way and a wrong way to do it? Well, as a matter of fact there is. And there are even multiple ways of doing it the right way! Rolled up sleeves are quite acceptable in most business offices, and even necessary in certain business environments where the hands are used frequently and sleeves might interfere.

We love the way rolled-up sleeves give a guy an immediate air of “I’m ready to get down to business,” as if too much suit and dress accessories could get in his way. A guy with rolled-up sleeves is the one everyone turns to when things get hectic and tense, because he’s the one that can handle it. He’s quick to act, no-nonsense and respected. If you’d like to project this air, or if you’re just one of those people that hates the feel of stiff cuffs around your wrists, here are some guidelines for looking cool while you keep your cool.

Method One:
1.    First, remove cufflinks if you are wearing them and unbutton your cuffs.
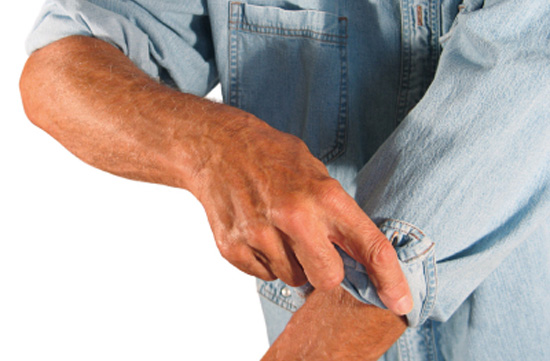
2.    Flip the cuff over, then pull it up toward the elbow, smoothing it as you go. Stop when the cuff is just above the elbow.
3.    Evenly roll the inside-out material hanging below the cuff up until it covers half of the cuff.
4.    Leave the rest of the cuff visible, so that it peeks out of the roll.

Method Two:

1.    Unbutton your cuffs and remove any cufflinks you may be wearing. If you are wearing cufflinks and prefer not to remove them, just detach them and refasten to the outside cuff before rolling up your sleeves.
2.    Fold the cuff up to the same width as the cuff.
3.    Continue folding the cuff, making sure that the folds are the same width as the first cuff fold, until your sleeve is the desired length.
4.    Be sure to smooth the fold after each roll to prevent lumps and wrinkles.
5.    This method can also be used if you are wearing a long-sleeved shirt without a cuff. Simply fold the bottom edge of the shirt up 2-3 inches, then continue with steps 3 and 4.

Method Three (The Italian Method):

Italians have a way of adding stylish panache to just about anything, including rolling up sleeves. Here is how the Italian-style method is done.
1.    Unbutton your cuffs, first removing any cufflinks you may be wearing.
2.    Flip the cuff up, then pull it up until it reaches the middle of the elbow.
3.    Fold the shirt material below the cuff up either once or twice, depending on your length preference and how thick you want the roll to be, until it reaches the top of the cuff.
4.    An Italian fold never goes past the elbow. The roll is always tight and flat, without any bulk.

How your sleeve is folded and how high above the elbow the fold goes can be as telling about you as the clothing you wear. Roll up your sleeves with style to achieve a cool, can-do look.