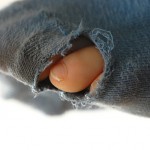
A common thing to do once your socks have holes in them is to throw them out and go get new ones, but did you know that you could save money and your socks by darning them? This doesn’t mean to belittle the socks by yelling at them and calling them names, but it is a process in which to repair the foot wear and make them as good, if not better, than new.
Darning a sock is not simply sewing up the hole as this would cause the sock to be mis-shapened and actually create a bump with the end result being a nasty blister where the bump resides. Darning is however a sewing technique and before the time of mass production it was a fairly common practice. You too can learn this method of sock saving and save yourself some money in the process.
Here are the steps to darn a sock:
1. Get your supplies: Before you start to darn, you need the supplies to do so. You will need a darning needle, the proper thread, and a light bulb. For cotton or synthetic socks you will want to go with embroidery floss and if your socks are wool then you will want to go with, you guessed it, wool. The light bulb will be used in place of what is called a darning egg, which you can buy if you want to, and will keep the hole supported and make your repair much easier.
2. Prepare the hole: Pull the sock over the light bulb, or darning egg, and gently cut away any jagged edges that the hole may have. Be sure not to make the hole any bigger than it already is though. Now thread the darning needle and get ready to go.
3. Sew parallel: Begin by sewing a few running stitches above and to either side of the hole. Then push the darning needle through one end of the hole and make one large running stitch to the other side. Repeat this process until the hole is completely blocked up with parallel stitches.
4. Sew vertical: Repeat the process going vertically this time. Be sure to weave in and out of the parallel stitches. Keep going until the hole is completely healed up.
It is important to note that you should not use any knots in your thread. If darned properly, knots are not necessary and will only add discomfort to you foot if used. You also need to be extremely careful when using a light bulb as opposed to an actual darning egg as too much pressure can be the cause of broken glass and thus lead to you having to go to the hospital to have your hand ‘darned’ up.
The key to successful darning is to get right after a hole once it has formed. Don’t wait until the hole is too big to work with and remember the old saying, ‘A stitch in time saves nine,’ meaning catch it early and save yourself some time and trouble.
