Category Archives: Clothing Care / How To

Butter stains

How to Remove Butter Stains from your Clothes

Butter stains

With almost any type of food you eat butter makes it better. Butter can add flavor and taste to dishes that may otherwise not be for you. Really when you think about it, is there anything butter doesn’t make better? Well the answer is yes; clothes. Spilling melted butter on your clothes can be one of the most frustrating things you will ever do and no matter how many times you wash the garment it may seem that you can still see it. But good news, there are ways to remove butter stains from your clothes.

First of all you should never dry the butter stained article of clothing in your clothes dryer until the stain is gone because doing so will help set the stain. Once you have positively identified the butter stain here are some different tips to help you eliminate it:

•    Baking Soda:
As soon as you remove your butter stained clothing, take some baking soda and sprinkle it onto the stain and rub it in gently. This will help to absorb the stain and make it easier to wash. After letting it sit for a few minutes, rinse out the baking soda with warm water.
•    Pre-treat: Once you have used baking soda and rinsed it away it is now time to pre-treat your stain. Many people like to use a pre-treat spray like Shout but there are a couple alternatives that may work even better. Using Dawn dishwashing detergent is a great way to help combat butter stains. The reason is because Dawn is designed to remove grease when washing your dishes. Well, butter is a form of grease. Another pre-treater that works well is regular hair shampoo. Not only does it seem to work very well in ridding your cloths of butter stains it is also a lot more cost effective when compared to other pre-treaters. Either way, take your pre-treater of choice and apply a small amount in the middle of the stain and then rub it in for about five minutes. Let it sit for a few minutes more and rinse again with warm water.
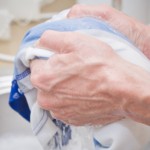
•    Wash garment: Now you simply wash the stained garment with the rest of your cloths but you will want to use the hottest water possible in accordance with the garment itself. Once the garment is washed do not throw it in the dryer with the rest of the load.
•    Dry the garment: Take the stained garment from the load and allow it to air dry. The reason for this is to be sure that the stain is completely gone. Remember, if you put butter stained clothes in the dryer before the stain is gone you will risk setting in the stain permanently.
•    Repeat if necessary: The stain should be gone by now but if it isn’t, simply repeat the process. Some stains are going to be more stubborn than others and may require an extra treatment or two.

Though the process may seem lengthy, it really doesn’t take all that long to accomplish and the end result may just be one of your favorite garments being saved.

Wool

How to Care for Wool Clothing

Wool

Wool clothing can keep you warm and look great all at the same time. If you want your wool clothing to last for a while it is important to know how to care for them. While not as easy to care for as your everyday garments, the care of wool clothing is not all that hard so long as you go about it in the proper manner.

Here are some tips that will help you to properly care for your wool clothing and ensure that they will look great for years to come:

•    Fuzz balls: The one thing about wool clothing is that it can and does develop all sorts of little fuzz balls that can make it look terrible. You can try to brush these fuzz balls away with a lint brush or pick at them if you are totally bored but there is an even easier way to deal with them. They now sell a ‘de-fuzzing’ hand-held machine that was created especially to deal with these little pests. They are not expensive at all and obtaining one and using it regularly will keep your woolens looking their best.
•    Cleaning: Most wool clothing is dry-clean only, but you can wash these articles of clothing by hand. The key is to be gentle and always towel and air dry only. Never use a dryer and wash one article of clothing at a time.
•    Hanging up: If you have a nice wool sweater, take care of it when hanging it up. Use a hanger that has padded sides and be sure that you place that sweater inside a garment bag that zips up. You should use a fabric garment bag so that the wool has a chance to breath as opposed to a plastic garment bag which will not allow for any breathability.
•    Storage: When it simply becomes too hot to wear your wool garments you will want to store them. The big thing with wool is that there are insects that just love it and will ruin your favorite woolens if given a chance. This can be combated with cedar. The perfect place to store your woolens is in a cedar chest. If you don’t have a cedar chest then get a plastic container with a lid that hold tight and place your woolens in the container with a mess back that is full of cedar chips. Once it is time to again wear your wool clothes, you will want to take out the clothing and allow it to air out for a couple of days to avoid smelling like you just walked out of a forest.
•    Before you put it on: Before you even put on your woolens you can help care for them by observing a few simple rules. Never apply make-up, hair spray, or colognes and perfumes while wearing your woolens as these things can cause nasty stains. Apply and let all of these things dry completely before you dress in your favorite wool clothes.

Caring for wool is a bit more time consuming than other articles of clothing you own, but when properly cared for you will enjoy them for many seasons to come.

Hats and caps

How to Store Hats and Caps

Hats and caps

For every hat or cap that you own there is a time and a place to wear them. Sometimes you may only wear a certain ball cap a couple of times a year and other hats you may wear on a rather frequent basis. Perhaps you have a fancy fedora or cowboy hat you like to wear when you go out. Whatever the case may be what is equally as important about when and where you wear your hats and caps is what you do with them when you are not wearing them and instead are storing them.

Of course how you actually store a hat or cap will depend largely on the type of hat or cap you have and you can always just leave your hats lying around the house, but there are several ways to easily store your hats and caps that will keep the homestead looking ship-shape. Here are some of those ways:

•    Hat boxes: This of course is only going to apply to your fancier hats. Top hats, fedoras, cowboy hats, etc. There a number of hat boxes that can be obtained that are not too expensive and will be worth every penny you spend as they will keep your fancier hats from being harmed in any way. The nice thing about hat boxes is that if you have more than one you can easily stack them on the top self of your closet and they will then be out of the way and take up less space.
•    Hanging hat racks: If you have a lot of ball caps you can display them and keep them neat all at the same time. This is accomplished with a hat rack that you hang on the wall. This type of hat rack will usually be made of wood and will have several pegs that protrude out so that you can hang the caps from them. These types of hat racks are great because you can get one for each individual in the house and put them in their rooms. You would be surprised at how much clutter a dozen ball caps can create. Get them up off the floors and off the dressers with a hanging wall mounted hat rack.
•    Over the door hat rack: This is another great space saver. These types of hat racks usually have two hooks on the top that allow it to hang on any bedroom door. The hooks will lay flush with the top of the door which will allow the door to open and close as normal with no interference. These types of racks are usually made of plastic and are meant for more storage than they are display. But if you or someone in your house has a huge collection of ball caps then this is the ideal solution for you.

While your hats and caps may look good on your head when you are wearing them, they do not look good when scattered around your home. Fortunately there are plenty of ways to store your hats and caps that will keep your house looking tidy.

Pickle stains

How to Remove Pickle Stains from Clothes

Pickle stains

Pickles make the perfect side dish for a number of main courses. Sometimes there is nothing more enjoyable than these crunchy little delights. Pickles are great as you can eat them whole or cut them up and put them on a burger or sandwich. But these tasty treats can leave a nasty stain when pickle juice is dropped unknowingly onto your clothes. Doing so can leave you with a green mess that just doesn’t want to come out. But fear not, there is a solution.

Pickle stains can be a pain in the neck, but by following these tips you will be able to get your cloths as clean as new:

•    Rinse the stain: The first thing you want to do is to rinse the stain thoroughly with cold water. Run it under the water for a good five minutes or so and then let it sit for about twenty minutes.
•    Soak the stain: Next mix a bucket of warm water with some regular clothes detergent and after agitating up the water soak the garment in it for a few hours. If you want to you can leave it in overnight as the longer it soaks the easier it should be to remove the stain.
•    Pre-treat: When you are done soaking the garment take it out of the soaped up solution and wring it out. Then go to the stained area and sprinkle on some powdered laundry detergent. Get a brush and gently scrub the stain in a circular motion for about five minutes. You can also go with a number of expensive stain pre-treaters that they sell at the department stores but these days it is wise to save money wherever you can.
•    Soak again: Mix the same warm water and detergent solution that you did before and again let the garment soak for a while. This time it is not necessary to leave it in over night, but you should let it soak for at least a few hours.
•    Wash the stain: Take the garment out of the soak mix and wring it out again. Now you need only put the garment in your washing machine as you normally would and put it through a normal wash cycle. You should try to use the hottest water allowable by the garment.
•    Dry the garment: Once the garment is washed remove it from the rest of the load and do not dry it in the clothes dryer. Instead let it hang up to air dry so that you can be sure that the pickle stain is completely gone.
•    Repeat if you have to: If the stain remains you will have to repeat the process another time or two. While pickle stains are more common than you may think, they aren’t the hardest stains to get rid of and are usually removed within the first couple of applications.

As you can see removing pickle stains really isn’t that tough, so feel free to enjoy as many pickles as you like and don’t fear the occasional stain.

Suede

How To Protect Suede From Stains

Suede

Suede is a beautiful fabric that is very versatile and trendy. It is used in a variety of clothing from jackets and coats to shoes, skirts, pants, shirts and purses. It is a great choice for when the temperature calls for something a little warmer in the spring and fall. It also makes for toasty winter wear. The one drawback with suede is that it stains easily and is hard to clean. It even stains when water gets on it. Therefore knowing how to protect suede from stains is very important information that anyone who has suede clothes, shoes or accessories should know.

The most important thing you can do to protect your suede items from stains is to apply a commercial suede treatment/protective spray. This formula comes in a can and is easy to apply by simply spraying it on the item. Be sure to do so in a well-ventilated area. Let it dry before wearing the item. Apply the treatment when the item is new, at the beginning of each season when you will wear the item and as often as necessary in between. Following dry cleaning, it should also be reapplied.

Certain preventative methods will help you keep your suede from getting stained. Never apply perfumes, hair sprays, deodorants or other aerosols while wearing suede. If your suede garment touches your neckline, wear a scarf with it to keep makeup and oil from the skin from staining the suede. If your suede gets wet, it is best to dry it gently with a clean towel as much as possible. When you have removed all the moisture that you can, let it air dry before using a suede brush on it. For dried on stains like mud a suede brush is a good way to remove them.

Deal with small stains immediately to prevent them from becoming bigger more permanent stains. If you have an oil-based stain on suede apply talcum powder to soak it up and then brush the suede afterwards. Many other stains can be removed by used a white pencil eraser or a sandpaper-based emery board for fingernails. Be gentle when using either method and brush with a suede brush afterwards. Remember to keep an eye out for stains when you remove your suede items and treat any stain promptly. As with stain removal in general, the faster you deal with a stain the better the chances you have of keeping it from becoming permanent.

Seek out a reputable dry cleaner or leather expert who has a good reputation for dealing with suede. He or she should also be able to speak confidently about what you can and cannot expect from cleaning such items. Talk to several before deciding which one to use. Seek referrals from others who frequently wear suede.

Keep your luxurious suede items from becoming stained with a little prevention on your part and the knowledge of how to deal with spills and liquids so you can prevent them from becoming permanent stains. This knowledge is extremely valuable to the longevity of your suede wardrobe items.

Food and smoke

How do Clothes Absorb Smells like Food and Smoke

Food and smoke

How many times has this happened to you? You go to your favorite restaurant and have dinner. On your way home you realize that your clothes now smell like what your main course was. Or even worse, you visit a friend who is a smoker and you are only there for a handful of minutes. When you walk outside and get into your car you are disgusted to find that your clothes now smell as nasty as an ashtray. Why is this? Why do clothes absorb odors?

Clothes can absorb so many smells and odors, some that are more desirable than others. The reason for this is that clothing is made of material that has somewhat of an absorption property. Just like a sponge will absorb water, so too will clothing absorb smells. Here’s what it depends upon:

•    Material: Have you ever noticed that some articles of your clothing absorb odors more than others? This is because of the different materials that the clothing is made up of. It also has to do with the way in which those materials are put together. When you sit down to eat a piping hot plate of pasta with red sauce and garlic all over it, the steam will be all over the place. This steam is also going to contain the odor of the dish you are eating and this is what gets absorbed into your clothing. Your cloths actually act like a net as the fabrics are very finely woven together and this allows some of the odor to pass through, but it will also catch a significant amount of the odor as well. This will literally have the odors, ‘stick’ to you clothing and make them just a bit damp, even though you may not realize it. Once the clothing is dry the odors are left behind for all to smell. This is how you can get that nasty B.O. smell stuck in the arm pits of your shirts if you aren’t wearing anti-perspirant.

•    Your chemistry:
If you an individual that perspires quite a bit you will allow your clothing to be damp at many different points throughout the day. The damper your clothing is the tighter that net of woven fabric will be and thus the more odors that will be absorbed. Remember, once the clothing is dry the odors are left behind.

•    Environment: Some things stink more than others. That said, the type of environment that you are in is another reason your clothes will absorb odors. With food, if something is spicy or has a lot of garlic, there will be more odors produced. In your home, there will be more odors if you are a smoker or you have animals like dogs or cats. As your clothing gets whisked through the air by you moving around it will naturally absorb those odors in the environment. This explains why cloths seem to smell so much better when they are hung outside to dry. The environment is fresh air, flower, grass, and sun. That is what gets absorbed and thus it smells good.

Whether you like it or not, clothes will always absorb odors and all the cologne and perfume in the world can’t cover up certain smells. Remember, a cleaner environment equals cleaner smelling clothes.

Sock

How to Darn a Sock

Sock

A common thing to do once your socks have holes in them is to throw them out and go get new ones, but did you know that you could save money and your socks by darning them? This doesn’t mean to belittle the socks by yelling at them and calling them names, but it is a process in which to repair the foot wear and make them as good, if not better, than new.

Darning a sock is not simply sewing up the hole as this would cause the sock to be mis-shapened and actually create a bump with the end result being a nasty blister where the bump resides. Darning is however a sewing technique and before the time of mass production it was a fairly common practice. You too can learn this method of sock saving and save yourself some money in the process.

Here are the steps to darn a sock:

1.    Get your supplies: Before you start to darn, you need the supplies to do so. You will need a darning needle, the proper thread, and a light bulb. For cotton or synthetic socks you will want to go with embroidery floss and if your socks are wool then you will want to go with, you guessed it, wool. The light bulb will be used in place of what is called a darning egg, which you can buy if you want to, and will keep the hole supported and make your repair much easier.

2.    Prepare the hole:
Pull the sock over the light bulb, or darning egg, and gently cut away any jagged edges that the hole may have. Be sure not to make the hole any bigger than it already is though. Now thread the darning needle and get ready to go.

3.    Sew parallel:
Begin by sewing a few running stitches above and to either side of the hole. Then push the darning needle through one end of the hole and make one large running stitch to the other side. Repeat this process until the hole is completely blocked up with parallel stitches.

4.    Sew vertical:
Repeat the process going vertically this time. Be sure to weave in and out of the parallel stitches. Keep going until the hole is completely healed up.

It is important to note that you should not use any knots in your thread. If darned properly, knots are not necessary and will only add discomfort to you foot if used. You also need to be extremely careful when using a light bulb as opposed to an actual darning egg as too much pressure can be the cause of broken glass and thus lead to you having to go to the hospital to have your hand ‘darned’ up.

The key to successful darning is to get right after a hole once it has formed. Don’t wait until the hole is too big to work with and remember the old saying, ‘A stitch in time saves nine,’ meaning catch it early and save yourself some time and trouble.

Jeans

How to Care for Jeans

Jeans

Jeans come in all shapes and sizes and nothing is more versatile when it comes to clothing. Jeans can be worn for just about any occasion and can be dressed up with a nice shirt or dressed down with a simple t-shirt. Jeans are even more popular these days because of the wide variety of colors that are available. Taking good care of your jeans will have you enjoying them for many years to come.

Because jeans are colored with indigo ink there will naturally be some color lost when you wash and dry them with your other garments. The best way to care for your jeans is to of course take them to dry cleaners, but this is too costly for most. With that in mind here are some tips to help you keep your jeans looking as good as possible:

•    Read the labels: All jeans come equipped with special care instruction sewn right in. Be sure that you read the labels as some jeans go against the norm and need to be washed in warm water as opposed to cold like most. Some jeans even say to dry clean only.

•    Don’t wash excessive pairs of jeans:
Limit your jean washing to three or four pairs at a time. Because denim is heavy, too many jeans in the washer at the same time will diminish the effectiveness of the washer to clean the jeans. Instead of using more than three or four pairs of jeans, fill the remainder of the washer with lighter material clothing of the same color.

•    Inside out:
This is perhaps the easiest trick to do. By turning your jeans inside out before you wash them you are lessening the impact felt by the jeans because of the washer’s agitator. This will help to keep your jeans from rapidly wearing down.

•    Be gentle:
If you have jeans that have rips or holes in them use the gentle cycle to avoid making them any worse. Many jeans these days come pre-ripped and shredded and most of these will advise the gentle cycle on their care tags.
•    Avoid over drying: The more you dry denim the tighter it gets. Once your jeans are dry, take them out of the dryer immediately. Avoid over drying your jeans at all costs. Pay close attention to how long the dryer runs when your jeans are completely dry and make a note of the time so that the next time you will know how long to set the timer on the dryer for.

•    Avoid bleach:
This sounds like a no brainer, but you would be surprised. Bleach can be found not only in the white plastic jugs these days, but also in many detergents. Bleach and jeans equals eighty’s music videos. If that is your goal, then go for it; otherwise make sure all forms of bleach stay far away from your jeans.

With proper care you and your jeans will look your best for many seasons to come. The only thing you will have to worry about is maintaining your weight so that you always slip comfortably into your favorite pair of jeans.

Sneakers

How To Wash Sneakers

Sneakers

Everybody has a pair of sneakers. Usually it’s the most comfortable piece of a person’s wardrobe. You come home from work, step out of those uncomfortable shoes you have to wear all day and into your sneakers for lounging around. You go everywhere in them. Depending on your activities and the use they get, it might not take long for those sneakers of yours to get very dirty. While making sure the cleanliness of the rest of the wardrobe is a priority, sneakers often are overlooked when it comes to washing them regularly. How do you actually clean sneakers? It’s very simple.

There are two ways to wash sneakers. They can either be washed in a machine or washed by hand. Both do the job. Washing machines might be a little more rough than the direct care one could give when washing manually but either system will result in sneakers you will no longer be ashamed to be seen in.

Washing Machine Method – The first step is to remove the laces. Be careful when pulling them out. If they’re frayed in any way they could be torn in two pieces. Next, place the sneakers in a pillowcase and then directly into the washing machine. Placing the sneakers in pillowcases keeps the sneakers from being scratched as they bounce around the machine. The machine’s drum is also protected from the bumping and potential tangles caused by the laces. Set the machines setting to delicate and use cold water after adding about a half cup of detergent. When finished, the sneakers should be allowed to air dry. Stuff paper towels or newspapers into the shoes so that they retain their shape. Don’t use a drying machine as the heat might damage the sneakers.

Washing By Hand – Again, remove the laces and also inserts if the sneakers have them. Prepare a solution of soap and water or use a pre-purchased athletic shoe cleaner. A toothbrush can be used to clean the sneakers all over with the soap and water solution. Then using the same solution clean the inserts and laces. Once completed, hold your shoes under a running spigot or hose of fresh water until the soap is washed away. Any of the remaining solution can be wiped off with paper towels. Using more paper towels and/or newspapers, stuff the shoes so they retain their original shape as they dry. Replace the paper towels should they become saturated with water. Allow to dry in the sun if possible as the sun will actually help make white sneaker whiter. Once dried, replace the inserts and laces. To keep them fresh, baking soda can be sprinkled sparingly on the inside.

The cleansers that you choose are important as some are better than others. The best for cleaning shoes are stronger cleansers like Comet, Mr. Clean Magic Eraser, and Greased Lightning.

Now your sneakers should be thoroughly cleaned. Make sure they’re completely dry before using them as this will extend their life. Have fun showing off your like-new sneakers.

Watermelon stains

How To Remove Watermelon Stains

Watermelon stains

Watermelons are practically a symbol of summertime. No other fruit so completely screams summer like a juicy watermelon. It is fresh, provides hydration, is sweet and is actually pretty fun to eat. Seeded watermelon is the perfect outdoor fruit, with many a watermelon lover enjoying seed spitting as part of the fun of partaking in their favorite fruit. Watermelon works for celebrations wonderfully. Just one watermelon and you’ve got enough fruit for a gang of people. Summer celebrations just seem to revolve about this colorful, fragrant fruit. There is just one drawback however- the juice. It runs everywhere. In fact, if you pick up a piece of watermelon to bite into, you can rest assured that you will be dealing with watermelon stains later when it is time to do the laundry.

If you notice that you have watermelon stains on your clothing, treat them right away. Use a paper towel to soak up any excess juice. Then if you can’t change out of your clothing right away to treat the stain, then use a wet paper towel to blot at the stain to get as much of it off your clothing as possible.

Luckily for you watermelon stains are one of the easiest types of food stains to eliminate from clothing. The juices of the watermelon are mostly water and contain very little pigment to deal with therefore you have a much easier stain to deal with than one from blueberries or beets, which are known serious stains.

The light pink stains from watermelon juice can usually be eliminated by pouring boiling water through the stain, if you are working on a fabric that can be washed in hot water. Before starting any type of stain removal treatments on clothes, be sure to read the fabric care label so you know what you can and can’t do with the fabric you are dealing with. You don’t want to pour hot water on a shirt that must be washed by hand in cold water only.

If the stain persists the easiest way to deal with a watermelon stain is to simply apply a commercial stain pretreatment to the item and then launder as usual. Be sure that the pretreatment you use is one that contains enzymes and is formulated for such types of stains. Choose a laundry detergent with enzymes also for added cleaning power. When the wash cycle ends, inspect the clothing carefully in good light. Make sure all traces of the stain are completely gone. If not, repeat one of the stain treatments already mentioned and leave the item soaking in the pretreatment for several hours before re-washing. Following a second washing your stain should be a thing of the past.

A little knowledge and a little time invested into dealing with clothing stains can save you a lot of money in new clothes and dry cleaning bills. Enjoy even the messiest food, like watermelon, without the worry of not knowing how to deal with clothing stains.

Soy sauce stains

How To Remove Soy Sauce Stains

Soy sauce stains

If you’ve ever cooked with soy sauce or eaten a meal with soy sauce what will strike you is the strong odor and salty taste. What might also strike you, if you aren’t careful, are splatter drops of soy sauce on your clothes. A single drop of soy sauce can be a very problematic thing to remove.

Of course, the best way to stainless clothes is to prevent the soy from splattering on you in the first place. Don’t wear whites and always wear something protective, like an apron. Even cover carpet areas that could become stained. If serving soy sauce to a group, have them spoon the sauce onto their plate rather than pour from anything potentially spill able. Also keep in mind that there are light and dark soy sauces. Cook with the light version as it contains lighter colors and is healthier for you too.

If the damage is done then this list modern and traditional methods should provide you with what you need to know to rid yourself of pesky soy sauce stains.

Act Fast. If you’re cooking and notice a stain on your outfit wash it as quickly as possible. Soy sauce contains a staining substance and this substance takes time to be fully absorbed into fabric. By running the affected area under lukewarm water this will be fixed.

Try Detergents. Mix some detergent with water and rub the ensuing foam on the area with the stain. Remember that not all detergents will be appropriate for your particular fabric. Some might be too strong. Read the labels and judge for yourself. Even better would be to administer the cleansing agent with a spray. Then put the garment in the washer. You’ll want to go through a wash cycle quickly because some of the very modern cleansing agents can themselves leave stains.

Dishwashing Liquid. One traditional method is to combine a teaspoon of dishwashing liquid in about a cup of water and pour it on the stained area. Then blot until dry. Next combine one tablespoon of ammonia with a cup of water and again pour it on the stained area and blot until dry. Finally, wipe the area with a clean water saturated sponge. Repeat these steps until the stain is no longer visible.

Ice. Another tradition technique involves ice. Simply rub an ice cube over the stained area. Then, run the fabric under cold water while rubbing the stained area with your hands. Hopefully, the stain will wear off.

Peroxide. For carpets that are made of stronger fabrics use a spray bottle with peroxide. Spray the stain, let it sit, and then blot up the stain with a paper towel. If the carpet is very wet, try a shop-vac on a high setting until you draw out the liquid. Just be sure to blot and vacuum without pushing the stain deeper into the carpeting.

Of course, if all else fails and you’re feeling totally hopeless, take the garment to the dry cleaner and plead for help.

Black clothes

How To Prevent Black Clothes From Fading

Black clothes

Nothing looks as elegant and as chic as black clothing. It covers a multitude of sins, makes you look slimmer, works with almost every complexion and matches almost everything. Black clothes are the basis of many a wardrobe and are more versatile than practically any other color. The only trick with black clothes however is keeping them black. Faded black clothes just do not have the same style power as true black. Faded black looks tired and rather blah. Therefore it is important to know the tricks of how to prevent black clothes from fading.

The biggest thing to consider when you are worried about black clothes fading is how you wash them. If you choose to dry clean your black clothes, your worries about fading are over. However, this is not realistic for most people, especially if they have multiple pieces of black clothing. Therefore you need to understand the hows and whys of laundering black clothes.

When you are washing black clothes at home, do so in cold water. This will minimize any fading that might occur. Use gentle laundry detergents and do not add laundry boosters or bleach of any kind. Use the gentle cycle on your washing machine as much as possible when washing black clothes. Remember to never put towels or other abrasive fabrics in the same load as your blacks. They will agitate the fibers in the black clothes causing fading. Turn clothing inside out before washing to avoid fibers rubbing on other items.

When it comes to drying your black items, you should hang them to dry. If you put them outside to dry, keep them inside out, so the sun does not contribute to the color fading. Do not put them in a hot clothes dryer as this will speed up fading of darks.

Special detergents have been formulated in recent years to be used specifically with black clothes. It is supposed to prevent black items from fading. This is said to be a good investment especially if you have a predominantly black wardrobe. You can also do an at-home fix of your faded blacks periodically by adding a package of black color dye to your next load of black laundry.

Another trick to prevent black clothes from fading is to soak the item in a mix of cold water and vinegar prior to wearing it to set the color. In each of your subsequent washes, add a capful of vinegar to the rinse water. Some suggest adding salt to the first wash to set the color of black clothes.

One thing that will greatly reduce the anguish you suffer when your black clothes fade is to choose fabrics that do not fade greatly. Acrylics and polyesters tend to hold their color well. Silks and satins also resist fading. The biggest culprit when it comes to fading is cotton, the most popular of fabrics. However, with the right treatment, even cotton can have minimal fading.

Treat your black clothes right and you can succeed in keeping them true black as long as possible. You’ll look chic and sophisticated not faded and dull in your vivid black clothes.

Squeaky shoes

How To Fix Squeaky Shoes

Squeaky shoes

Have you ever heard the sounds of a basketball game in a gym? I don’t mean the cheers and boos from the crowd, but the squeaky sounds made by the players as their shoes move against the floor when they perform quick starts and stops en route to a fantastic three-point shot. It’s a sound synonymous with sports, whether it is basketball, racquetball, or indoor soccer.

These sounds are fine and most likely expected inside a gym, but what if these sounds emanate from shoes when they’re not wanted? Shoes that announce your arrival long before you arrive can be quite embarrassing. Who would want squeaky shoes while walking down the street or in a library? Maybe you think that’s just the way it is and eventually the shoes will lose their squeaky sounds after they’re broken in. You’ve probably never considered that there are intentional things that can be done to correct the annoying squeaky shoe problem.

Well you’re in luck, and you’re not the only person with shoes that sound like you stepped on a child’s toy. Squeaky shoes are a common problem and it’s caused mainly by two materials that rub against one another. There are both home-made and professional remedies for this problem.

First, the home-made methods:

Remedy #1: Super Glue
If you’ve identified that the heel is the cause of the noise, it likely means that it’s loose. Simply add a few drops to the inside part of the heel and hold it tight against the main part of the shoes until it adheres. Then allow it some time to completely dry.

Remedy #2: Baby Powder
Most shoes come with an inner sole. Lift the sole, sprinkle baby powder inside, and then replace it. Hopefully the powder will soak up any moisture that could be causing the sound.

Remedy #3: Paper Towels
Have you been out in the rain and stepped in a puddle? If your shoes are wet in any way they will likely squeak. If this is your situation, stuff your shoes with paper towels and allow them to dry. The damper they are the more stuffing they’ll need

Remedy #4: Silicone Spray
Just spurt the spray around the regions that are rubbing together. This works great and doesn’t cause damage to leather shoes.

If you’ve tried all of these solutions and nothing seems to work, it might be time to call on a pro. It might sound old-fashioned, but cobblers still exist and are ready to help.

Remedy #5: Take Your Shoes To A Cobbler
If the shoes are very old and the soles are worn, a cobbler can resole the shoes for you.

Remedy #6: Take Your Shoes To A Repair Shop
Sometimes the shank becomes loose in old shoes and causes them to squeak. A shoe repair shop can help.

So now there is hopefully no more reason to adjust the way you walk to avoid squeaky sounds or feel ashamed when your shoes are louder than you are.

Crayon stains

How To Remove Crayon Stains From Clothes

Crayon stains

Crayon stains are the inevitable hallmark of having little kids in your home. Sooner or later a crayon makes its way into the washer and dryer or melts onto clothes in the hot sun. Nothing is more disheartening than to discover clothes that have been stained with crayons. No matter how your crayon stains happen, it is important to know how to deal with them so that they do not turn into permanent stains.

One of the trickiest parts of crayon stains is that it is a combination stain. You will have to deal with removing color and grease. Therefore multiple stain treatments may be necessary, however typically grease removal products should take care of both aspects. The main thing to remember when dealing with a crayon stain is to get started removing it as soon as you notice it. As with any clothing stain, the longer the crayon stain sits before you attempt removal the harder it will be.

The first thing you must do is to use a blunt knife or other fine-edged object to remove the excess crayon residue. Since the crayon is made of wax, you need to treat it as you would a candle stain. Place an ice cube on it to make sure it is as solid as possible and scrape off as much of it as possible.

In order to treat the grease portion of the stain, you will need to treat it as you would any grease stain. One of the best pre-treatments for grease stains is Dawn dishwashing liquid. Designed to cut grease, it can be applied directly to the stain and rubbed in. The item should then be laundered with the hottest water that is considered safe for the fabric. Another great grease-fighting pre-treatment is hand cleaner that is formulated for mechanics. The same technique is used when pre-treating using this type of product. For particularly tough crayon stains, pre-treat the stain with WD-40 before laundering the item in hot water, color-safe bleach and regular detergent. You should test check a hidden part of the garment first before using WD-40 on it.

After the item has been washed, check to make sure the stain is out. If it is not, do not dry it. Repeat the stain treatment or opt for a different stain treatment method and wash the item again. Be sure the stain is completely gone before drying the clothes. If your clothes have been stained by a crayon that made its way through the washer and dryer, make sure you clean out the dryer before you put the newly cleaned clothes back in there. The best way to remove crayon from the drum of a dryer is with WD-40.

Now that you know the secrets of removing crayon stains from clothes, you can rest easy when it happens. You surely won’t wish for crayon stains to appear because dealing with them is time consuming, but at least you know the tried and true methods to ensure your clothes are not ruined forever.

Iron

How To Iron A Crease In Pants

Iron

Nothing looks crisper than a properly pressed pair of pants. Nothing is more evident of a lack of attention to detail than poorly pressed pants that have multiple creases. Knowing how to iron a crease in pants is an art that is becoming increasingly lost as more and more people opt for wash and wear. If you want to appear nicely pulled together and professional, without spending a fortune on dry cleaning, you need to learn the proper way to iron a crease in pants.

The first thing you need to do is make sure you have the right tools. It is very important that you have a firm flat surface on which to do your ironing. A soft bed is not going to work well. Ironing boards are a great tool to have in your home if you plan to do any amount of ironing. If not, you can use the floor or a cleared kitchen counter top. Just be sure to pad the area with clean linen that you have pressed to ensure that no wrinkles are transferred from the padding to the clothes you are ironing.

You should also have a steam iron as a dry iron often does not give as good a finished result. Spray starch may be needed if you have fabric that is not holding its shape well or if you prefer a stiffer appearance to your clothes. The last piece of equipment you need is a pressing cloth, which is typically a fine piece of white fabric to be put between the iron and the pants to avoid scorching or discoloration of certain fabrics from the direct heat.

Before you begin actually pressing the pants, you will need to lay them properly on the ironing surface. Hold the ends of the pants together with the seams touching each other. This will create a natural crease in the middle of the front of the leg and the back of the leg. This is exactly what you want to iron. Lay the pants on the table exactly as you have lined up the seams.

Place the pressing cloth on the portion of the leg that is showing and pass your hot iron on the steam setting over the pressing cloth. Pay close attention to holding the iron down longer than usual at the crease to create a crisp line. Move the pressing cloth as needed. When the top portion is done, which is actually the exterior side of one leg, lift that leg gently and place it out of the way so you can iron the inner part of the other pants leg. Again use the pressing cloth as you go.

When you have completed that section, pick up the pair of pants and turn them over so that the unironed exterior part of the second leg is now on top. Repeat the process as you did before. You may also need to lay the pants flat to iron the waistband and pockets, but this will not affect the great crease you have created in your pants. An alternate method is to use a steamer to press your clothes in which case you can often create a crease in pants while they are hanging.

Now that you know how to iron a crease in pants, you are equipped to make your wardrobe look like it has been professionally dry cleaned, without the cost of doing so.

Underwear drawer

How To Organize An Underwear Drawer

Underwear drawer

It’s time to get dressed. It’s a cold day, you’ve just showered, and the first stop is the underwear drawer. Then it hits you. You see a drawer or drawers full of underwear, sometimes so full the drawer can’t be closed. Different colors and fabrics are sticking out of the drawer in all directions while you stand there, shivering, trying to find something to wear. If this scenario sounds familiar then you need to organize your underwear drawer.

The first step is to dump out the drawer containing your underwear onto a bed. It’ll be quite a pile but don’t worry as there will be a method to attack this madness. Whether you’re a man or woman, think about categories and which piece of fabric fits best into a particular category. Some category ideas might include boxers, briefs, panties and sports bras.

One way to begin organizing is to examine each piece of clothing. Try it on. Does it still fit? Is it something that can be worn in the future? If not throw it out. Whittle down to what you actually use. The next step is to separate garments into two categories, work and non-work. For men these categories might blur and not take much thought but women might have more sub-categories such as work and non work bras, full coverage underwear, boy-cut styles, or thongs depending on the degree of coverage and the look that’s needed. Organizing by color is also another popular way to go.

Have different boxes and containers for different types of underwear. G-strings could be in one container while boxer briefs are in another. You may want to line the containers first with self-adhesive tape. Lining a container protects soft fabrics and increases their longevity. Remove the lids to the containers and place the entire container in the drawer.
Containers come in all types as well. If you’d like to place all undergarments of one type together in one container then that is a fine solution. Also available, however, are drawer separator options that allow you to actually place one piece of underwear in its own cubicle area. Some are spring-loaded which will enable you to conserve more space than ever by helping you minimize the space per garment.

How you place the garments in these containers is up to you. Folding is an option. This can keep your garments in good shape and increase your available space. To save space consider storing underwear one layer deep. This is also helpful in minimizing the time it takes to search for something you want. Bras can be folded one cup into another while certain very sensitive pieces, like delicate lingerie, might need to actually be hung up so details like lace won’t get damaged. If folding or hanging is not for you and too tedious, there’s nothing wrong with simply rolling your underwear into a ball and throwing them into the containers.

There are endless ways to organize an underwear drawer. As personal as underwear is, so are the ways they can be organized. No matter how you do it, just keep in mind that you’ll want easy access to what you’ll need.

Swimsuit

How to Properly Care For Your Swimsuit

Swimsuit

Regardless of how you treat it, your swimsuit gets a lot of rough treatment. It soaks in chlorinated water for long periods of time. Abrasive sand rubs the delicate fibers. Harsh chemicals, oils and colors from sunscreen products are smeared on your swimsuit. It is exposed to hours of bleaching sunlight almost every time you wear it. This is typical abuse of a swimsuit by those who are careful. However many people do worse by not washing their suits after each use, throwing them in a hot clothes dryer and other abuses. Knowing how to properly care for your swimsuit will ensure you get as much use as possible from yours.

Every time, without fail, when you are finished using your swimsuit, you should wash it out. Treat it like you would underwear. You certainly wouldn’t wear underwear a second time without washing it and swimsuits should get the same treatment. In fact, if you are swimming in a chlorinated pool or hot tub, you should hand rinse the suit as soon as you take it off to get as much chlorine out of it as possible if you cannot get it to a washer right away.

It is important to hand wash or use your washer’s gentlest cycle to wash your swimsuit. The fabric used in swimsuits is delicate and can easily get damaged when thrown in a regular wash cycle. Another thing to avoid is washing your suit with towels or jeans. The suit should be washed alone or with other swimsuits which do not have metallic additions on them. This is to prevent unnecessary damage.

Use a detergent that is formulated for delicates when washing your swimsuit. Such detergents are designed to work well in cold water, which you should be using to launder your suit. Make sure all the detergent has been thoroughly rinsed out, as residual detergent in swimsuits makes bubbles in pools and hot tubs.

When your swimsuit is adequately rinsed, roll it in a dry towel and squeeze gently to remove excess water. Then lay flat to dry. You may also hang your suit to dry if it is of a material that will not stretch. Be sure to get it as dry as possible with the towel before hanging it.

When the suit is dry, store it flat in a drawer until the next time you need it again. Hanging a swimsuit for extended periods of time is not advised. Some other things to avoid in the care of your swimsuit include the following. Never leave your wet swimsuit on the floor or in a bag for an extended period of time. Mold may grow on it and ruin the suit. Never throw your swimsuit in a hot dryer. It will compromise the material in your suit.

By properly caring for your swimsuit, you can get multiple seasons of enjoyment out of it. Learn what to do and what not to do to keep it in the best shape possible.

Curry stains

How To Remove Curry Stains

Curry stains

Curry is a wonderful unique spice that is typically found in Indian dishes. More and more it is becoming a widely used spice throughout the Western World also. An enticing combination of sweet and spicy, curry has an unmistakable taste that people either love or hate. The more curry you use in your cooking the spicier the taste becomes. It also turns dishes an unmistakable shade of yellow. In addition, if you happen to drop some curry spiced food onto clothing, it leaves a distinct yellow stain. Make sure you act quickly if you want to prevent that curry stain from becoming a permanent one.

Immediately rinse the stain in lukewarm running water to minimize the damage. You will see the stain rinsing through. Keep the stained fabric in the running water until no more stain reduction can be observed. The next step is the pre-treatment of the stain itself. If you have an item which can be washed in chlorine bleach, apply some of the bleach directly to the stain and wash the item in a protein-based detergent as usual and the stain should be gone.

For clothing that cannot be treated with chlorine bleach, alternate methods must be used. Delicate fabrics and colored clothing that have curry stains should be treated with a half and half mixture of glycerin and warm water. Put the mixture on the stain and work it in. Let it sit for 10 to 30 minutes before you wash it in an enzyme-based laundry detergent.

For stubborn stains, big stains, set in ones or stains on rugged fabrics, a solution of hydrogen peroxide and water is just what is needed. You can dilute the peroxide in water in a 1 to 6 proportion to a 1 to 9 proportion. Try the solution on a hidden part of the garment before using it on the stain to check for color fastness. Once you are satisfied that this bleaching solution will not harm your article of clothing, soak the article in the solution for several hours. Check on the progress of the stain regularly and when you see that it is dissolved, remove the item from the solution and rinse it before washing it in an enzyme based detergent.

As you are working at removing a curry stain one thing to keep in mind is to never dry the item before the stain is completely gone. If you pre-treat the stain and wash it in the washer, be sure to check that the stain is actually out before you proceed with drying it. If not, you will have set the stain into the fabric. However if you catch it while the item is still wet you can do a second treatment and wash using the same method or a different one.

If worse comes to worse and you find that you cannot remove a curry stain from an item of clothing, don’t be too disheartened. Just designate that item as your official curry making and eating clothes and be sure to wear it whenever you are at risk for further curry stains.

Smelly shoes

How To Clean Smelly Shoes

Smelly shoes

So why do feet smell so bad? It’s an age-old question. The answer is probably obvious. What might not be obvious is how to clean the smelly shoes that are caused by bad-smelling feet.

Feet contain hundreds of thousands of sweat glands. This is normal in all people. Sweat is basically just salt and water, and doesn’t have much of a smell of its own. The smell is actually caused by bacteria. Sweat attracts bacteria and is their source of food. These millions of bacteria eat the sweat and then excrete it out. The bacterial excretion causes the pungent smells we’re so familiar with.

Actually, hands have nearly as many sweat glands as feet but don’t smell as badly. So what gives? The reason is our socks and shoes. The sweat from our feet can’t easily escape into the air like the sweat our hands excretes. Bacteria love the dark, damp confines of sweaty shoes and have a feeding frenzy. When you remove your kickers at the end of the day, the smell that hits you is all of that collected bacterial waste.

An obvious way to keep shoes from smelling is to keep your feet clean in the first place. Be sure to dry your feet completely after bathing and add a moisture-wicking powder between the toes. Wear socks like cotton or bamboo that are great at absorbing sweat and change them a couple of times throughout the day. Make sure your shoes are not overly tight which is another way to stimulate sweat to build up. Finally, go barefoot and let your feet air-out as much as possible. If you can, put your shoes on a rotation. That is, try to switch to another pair so that previous pair can air out before you wear it again.

Ok so what if you’re too late in cleaning your own feet and simply have shoes that you can barely stand to be in the same room with? There are numerous ways to rid those old, or sometimes barely-worn shoes of the odors they accumulate. Some methods are backed by sound science while others are Grandmother’s old ways that she swears does the trick. Whether you’re inclined towards modern science or old wives-tale methods, try one of these ideas on for size.

1)  A combination of anti-bacterial spray and anti-fungal foot powder. There are various sprays and powders on the market that should work well. One to try is Fresh Wave.

2)  Cedarsoles (insoles made from antifungal cedarwood) have an easy long-lasting effect.

3)  Place each shoe into a plastic bag and place into a freezer overnight. The next day remove from the bag and freezer. Place the shoes outside in the sunlight to thaw, and dry.

4)  Place cat litter into a pair of tights. Tie the tights securely and place in each shoe overnight. The shoes will be odorless the following morning. You will need to change the cat litter periodically. It works, cost is minimal and environmentally friendly!

5)  Remove the laces and soles from your shoes and put them all in a single pillow cushion. Put a small towel in there too and then put on a single 40 or 50 degree wash. repeat this procedure again immediately after the first time.

6)  Put rubbing alcohol on a cotton square and wipe out the insides of the shoes that are not washable.

Now go take care of those shoes before they take on a life of their own!

Gas stains

How to Clean Gas Out of Cloths

Gas stains

You are in a rush and late for an appointment. You swing into the gas station and begin to fuel your vehicle up. When you are done you whip out the nozzle only to find that the gasoline was not finished going into the tank. The result is you and your clothing being soaked in gasoline. While all you have to do is take a shower to get rid of the gasoline smell, how do you get it out of your clothing?

There is perhaps no harder smell to get out of cloths and for this reason many individuals simply throw out their gas soaked garments. Before you give up though, here are some steps to take to help you rid your cloths of gasoline:

•    Pre-soak: First take the cloths off and completely soak them in warm water and then ring them dry as best you can.

•    Sunshine: Lay the cloths that are soaked with gasoline out to dry in the sun. This will completely dry the cloths and the sun and fresh air will help to start the smell of the gasoline to dissipate.

•    Soak clothing:
Next mix warm water with some vinegar and swash the clothing around in it. Make sure you agitate the material of the clothing well so that the vinegar can penetrate the gasoline and do its job. Let the cloths sit in the solution for about 20 minutes. Take them out of the solution and put them back in the sun to dry.

•    Soak again:
Mix another solution of warm water and this time use Dawn liquid detergent. In addition to putting the Dawn in the water, put it directly on the spots where the gasoline soaked the garment and rub it in. Then swash the cloths in the solution and let it sit for an additional 20 minutes. Take the clothing out of the solution and once again put them in the sun to dry.

•    Use baby oil: Since gasoline is an oil based product, it will need the help of an oil based product to get it out of your cloths. Put your gasoline stained cloths in the washer and use regular detergent and top it off with a small amount of baby oil. Be sure you are only washing the gas laden cloths and nothing else.

•    Sunshine again:
You guessed it, more sunshine. Because the baby oil will be in the clothing now, you will want to set the cloths back out into the sun and let them dry. If you put an oil based product in the dryer you could be risking a fire. You will have to wash the cloths several more times before the baby oil is completely gone.

•    Repeat: For tougher gasoline stains, you may have to repeat this process a couple of times.

While it is a lengthy process it does in fact work. At the very least it is worth a shot before you just throw away cloths that are perfectly fine and can be saved.