Category Archives: Clothing Care and Stain Removal

How to Care for your Clothing and Tips, Ideas, How-to Remove stains from your t-shirts and clothing

How To Treat Stains On Leather

Stains on Leather

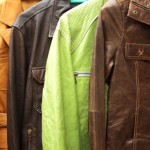
Leather is a rich, supple material that most people simply love to wear. It makes for warm yet stylish coats and jackets. It offers the most comfortable footwear possible. It makes jeans, skirts and even shirts that are sexy, protective and eye-catching. However, leather is a material that needs to be treated gently and cared for properly. You cannot simply toss leather into the washer and dryer. For this reason it is very important to understand exactly how to treat stains on leather and properly take care of it.

While leather is a very durable material, it needs to be cared for if it is to last. One of the things you must do is to treat the leather so that it remains soft and supple. You should also apply a commercial protectant to your leather clothes and accessories to keep them from becoming stained. Protection is the absolute best way to avoid having to deal with stains on leather at all. However, if you are unlucky enough to have to deal with stained leather, there are some specific tips that can greatly help you, depending on the type of stain you encounter.

If the stain is ink, you can easily tackle it with hair spray. Be generous in spraying hairspray onto the area. Blot the stain with a paper towel or rag that will be able to soak up the ink as it dissolves with the hairspray. Do not use the same part of the cloth twice because you will risk transferring the ink back to the leather. If you are unsuccessful, treatment may require a professional leather cleaner.

If the stain is from something greasy, you can start by lightly dabbing at the stain with an absorbent cloth in order to soak up extra grease. When this is done, put talcum powder on the spot and let it sit there for about 4 hours. Simply dust off the powder after the time has elapsed and the grease should be gone with it.

Gum stains can be removed with ice and heat. The first course of treatment is to hold ice cubes in a plastic bag to the gum to make it as hard as possible. You should be able to pull off much of the gum this way. If any remains, heat it up with a hair dryer and use a clean cloth to remove the residual traces.

Salt stains are a common problem for leather wearers in the north during the winter. To remove such stains make a solution of vinegar and water, with a 3 to 1 concentration. Put this solution on a clean cloth and whisk away salt stains.

Water stains are very common stains for leather. The best treatment is to simply let the leather completely dry out and apply a leather conditioner to make it look its best. Do not use any heat source to speed up the drying process, let it happen naturally.

If you have some great looking leather that you enjoy wearing, sooner or later you will be faced with stains you need to get rid of. Keep these valuable tips nearby and save the cost of pricey professional leather cleaners.

Olive oil stains

How to Remove Olive Oil Stains from Clothes

Olive oil stains

Cooking with olive oil is a great alternative to some of the higher cholesterol oils that are available today. Olive oil also adds a nice taste to many foods and leaves behind a wonderful aroma. But when you accidentally spill some olive oil on your clothes it creates a nasty stain that can be a hassle to get rid of you if you do not properly treat it.

As with any other oil stain, you do not want to dry the affected garment in the clothes dryer until the stain has been removed. If you do you will help to ‘set in’ that stain for good and once that happens there is little you can do. Here is how you can effectively remove those pesky olive oil stains from your clothes:

•    Baking soda:
Before you get the garment wet take a pinch or two of baking soda and sprinkle it over the olive oil stain. This will help absorb some of the oil and leave you with less to treat. Let the garment sit for a few minutes and then use warm water to rinse out the excess baking soda.
•    Pre-treat the garment: You can spend a good amount of money on some fancy stain removers but many that are on the market simply don’t work that well. A better solution is to use Dawn dishwashing detergent. The reason is because Dawn is meant to take out grease when you are washing your dishes. Olive oil is in fact a form of grease and the same agents in Dawn that help clean your dishes will also help you clean your oil stained clothes. Simply put a few drops right in the middle of the stain and rub together for about five minutes or so.
•    Soak the garment: Mix together warm water and some more Dawn and let the garment soak in the solution for a few hours or even overnight.
•    Wash the garment: After the garment has soaked you can take it out of the soapy solution and wring it as dry as you are able. Then simply wash the garment in a regular load and use the hottest water possible going by the washing instructions of the garment. When the load is done do not put your garment in the clothes dryer.
•    Dry the garment: Remember, if you use your clothes dryer to dry the garment and the stain is not completely gone then you will be setting in the stain and your garment could get permanently ruined. Instead let the garment air dry and be sure that the stain is completely gone.
•    Repeat if necessary: You may need to repeat the process if the stain is very bad. Olive oil is sometimes fickle and some stains require more than one treatment. There is no set number but if you keep at it, the stain will eventually go away.

Once the stain is totally gone you can once again treat your garment as normal and wash and dry it with the rest of your clothes as you normally would.

Bamboo

How To Care For Bamboo T-Shirts And Clothing

Bamboo

Bamboo clothing is taking the market by storm. This relatively new product, that has only been available for less than 10 years, is garnering a lot of excitement, especially from those who are concerned with the environment. The discovery of a way to turn bamboo into a yarn for clothing production means that there is now a new all-natural alternative to cotton. Like cotton, it is a breathable and natural fabric that is soft and comfortable to wear.

Caring for bamboo T-shirts and clothing is pretty straightforward.
•    You can machine wash and dry bamboo clothes on the gentle cycle. It is recommended that you remove them from the dryer as soon as the cycle is done. Some data suggests that bamboo can be fragile when wet, so care should be taken.
•    When washing, use mild detergent and no fabric softener, as harsh chemicals can damage bamboo.
•    For this same reason, never use chlorine bleach on bamboo.
•    Use cool or warm water when washing such items. Only items that have a higher blend of cotton in them should shrink. Shirts fabricated from only bamboo should not.

One of the major benefits of bamboo clothing is that the production of it has a much milder environmental impact than cotton or any other textile. Bamboo is like a grass and continues to grow without needing a period of replanting and waiting. It needs to be cut periodically, much like grass, and thrives from being cut back. Using the fibers from the bamboo plant to create textiles is a logical, natural step. Another plus is that bamboo fabric is naturally antibacterial.

If you care about the environmental impact of the production of the clothes you wear, switching to bamboo T-shirts and clothing is a great way to lessen your carbon footprint. There are multiple sources for finding great stylish clothes made of bamboo. If fact, you can even get custom-made bamboo T-shirts. You can order a bamboo tee in the color and style that you want and, like regular T-shirts, have anything you want printed on it.

You can use your new bamboo tee to educate those around you about the use of bamboo T-shirts and clothing. A good way to do this is to have tons of informational points about the use of bamboo clothing on a T-shirt. You can also simply put a clever phrase like “Got bamboo?” or “Do you bamboo?” on a T-shirt to bring attention to it. You can also just personalize your new bamboo T-shirt in any way you want. You can have a joke printed on it, a great photo, bragging rights or your cultural heritage. You can also have special event T-shirts made up for something you are organizing. Just remember to share with those who receive the T-shirts about what makes them different and how to care for them.

Get your very own custom-made bamboo T-shirt today and stand out from the crowd by the environmental impact that your clothes make.

Strawberry stains

How to Remove Strawberry Stains from Clothes

Strawberry stains

One of the tastiest fruits known to man is the timeless classic known as the strawberry. The strawberry is used in many different desserts but can be enjoyed equally as well on their own. The best is getting a really ripe strawberry that latterly burst with flavor as soon as it hits your mouth. Unfortunately these strawberries also usually burst all over your clothes as well leaving a very nasty stain. These stains are some of the hardest stains you will ever have to deal with.

You can try to use the stain removers you buy at the store but they will have little to no effect on these tough stains. But don’t throw your garments away until you try the following steps to remove the strawberry stain:

•    Rinse and blot: As soon as you realize your clothing has been stained you need to run those stains under cold water for about five minutes. Then get a paper towel and blot at the stain. This will help to remove some of the stain right away and makes the removal of the rest of the stain easier on you. Be sure you are blotting and not rubbing as rubbing will simply make the stain worse.
•    Soak the stain: In a bucket of cold water and regular laundry detergent soak your garment for a while. You don’t need to soak the garment for very long, but a couple of hours certainly won’t hurt. Once the time is up take it out of the solution and wring it out.
•    Make a magic mix: Take this time to make a wonderful and easy mixture that will almost always remove the strawberry stain. To create this concoction you mix baking powder with white vinegar and mix it into a loose paste, it’s that simple.
•    Treat the stain: Next take the stained garment and spread some of the magic paste over the stain. Let this sit on the stain for twenty minutes or more and remember, no rubbing.
•    Rinse the stain again: After the twenty minutes has elapsed rinse once again with cold water.
•    Wash the stain: Now wash the garment in your washing machine using the cold water cycle. Do not throw it in the clothes dryer when the washer is finished.
•    Dry the garment: Let the garment air dry to be sure that the strawberry stain is completely gone. If you dry the garment in the clothes dryer and the stain is still there, you will set the stain in and then you may as well just toss it in the trash.
•    Repeat if needed: If the stain remains you may have to repeat the process. Strawberry stains are among the more stubborn stains in the stain family so expect to give it an application or two for best results.

Now just enjoy your strawberry eating and don’t worry about the stains that will come. After all, it is probably easier to deal with these occasional stains than it is to give up strawberries as part of your diet.

Cashmere

How to Care for Cashmere

Cashmere

Is there anything softer or cozier to wear than cashmere? A sweater that is made of this ultra soft material is great to have, but there are many people who will avoid buying anything made of cashmere because they think it will be too hard to care for. While caring for cashmere does certainly take more time and patience versus other materials, it doesn’t have to be a major chore and it is anything but impossible.

Though almost any article of clothing that is made of cashmere is likely to say dry-clean only, you can effectively wash your own cashmere clothing and it really isn’t as hard as you might think. Here are steps to properly wash and care for cashmere:

1.    Prepare the water: Anything that you have that is cashmere should be washed by hand and the perfect place to do this is the sink or bath tub. Begin by filling the sink or tube with warm, not hot, water and then add some gentle detergent. Swish the detergent around gently with your hand and try to avoid the soap sudding up too much.
2.    Wash the cashmere: Now, one article at a time, place the cashmere clothing into the warm water mix and gentle swirl the clothing around. Do not agitate or wring the clothing while in the water as this may cause lots of unwanted harm to come to the clothing. You can now let the clothing sit for a couple of hours.
3.    Prepare the rinse: Once the clothing has been sitting in the water mixture for a little while you can lay out some fluffy towels and empty the sink or tub. Again, do not wring the clothes out. Once the tub or sink is empty fill it back up with warm water only and place the clothing back in the water. Do not swish this time but just let the clothing sit. After a while you will see remnants of soap and you will then know it is time to put the clothing back on the towel and empty the water once again. Most articles of clothing will require at least two rinse sessions but you will know they are ready to be completely dry when the water contains no more soap residue.
4.    Dry: Now that the washing is done, all that is left is to dry the cashmere garment. Lay out regular clean towels and place the clothing on top. Then roll the towel and gently press downward on the towel to help absorb the water. Repeat this a couple of times with different towels and end by laying the clothing on another fluffy towel. From here, the air will finish the job. Never hang the clothing to dry because the weight of the wet cashmere will almost certainly cause stretching to occur.

If this all seems too much for you then you can always take the garments to a dry cleaner and have them clean them for you. Whatever you decide to do, don’t try to get tricky and use your washing machine and dryer to get the job done. All that will leave you with is a clean article of clothing that you can no longer wear.

Nicotine stains

How to Remove Nicotine Stains from Clothes

Nicotine stains

If you are a smoker than you have no doubt seen some of your favorite garment exposed to nicotine stains. The tar that is left behind is the actual culprit of the stain and this can be a hassle to get out when you are relying on regular clothes detergent alone. But you do not have to get rid of your favorite clothes as there is a way to effectively remove those nicotine stains that isn’t all that hard.

There are many nicotine stain removers that are sold in the stores but these can be very expensive and are sketchy at best when it comes to their effectiveness. There is no need to spend the money because there is a solution you can make right at home for a fraction of the cost.

Face it, if you’re going to be smoker you will have to deal with nicotine stains. Here is how you effectively remove nicotine stains from your clothes:

•    Make a cleaning solution: You can make an effective wet cleaning solution by mixing one part glycerin, one pert dishwashing detergent that is white in color, and also eight part of water. Once combined, seal the bottle and shake it really well to ensure all the ingredients get a good mixing.
•    Prepare the garment: Grab the nicotine stained garment and before you attempt to treat it you will want to wet the affected area with cold water and let the garment sit for about twenty minutes. After the elapsed time rinse the garment on more time with cold water and this time do not allow it to sit.
•    Treat the garment: Now grab your home made spot remover and spray it liberally on the stain. Here is where you will also use the ‘secret ingredient’ which is nothing more than vinegar. Once the two cleaning agents are on the stain cover the stain with an all cotton pad or folded cloth and put that on top of the stain. Allow the cotton to set and then ‘lift’ away the stain.
•    Repeat: You may have to repeat this process several times until it looks like the stain is all but gone. When you are happy with the result you can move on to the next step.
•    Wash the garment: Now you need only wash the garment as you normally would in a regular load of laundry. However, when the load is done, do not dry the garment in your clothes dryer.
•    Dry the garment: Allow the garment to air dry to be sure that you have totally removed the nicotine stain. If you have not then you need to go back to square one and start over again.

There is no set amount of treatments that will determine when the stain will come out and there are several factors that will determine how bad the stain is including how long the garment has been exposed to smoke and how long the nicotine has been allowed to set in.

Once you have removed all the nicotine stains from your clothes you can keep them away by adding vinegar to your loads of laundry on occasion. You don’t have to do it every load, but once a month or so is not a bad idea and will help keep the nicotine stains at bay.

Shoes

How to Make Shoes Last Longer

Add an ImageShoes

These days people are saving money wherever they can. A great place to do so is with your shoes and this can be achieved rather easily if you just give your footwear the proper care it deserves. Depending on what type of shoes you have will depend on the care, but for the most part there are a number of things that you can do to help stretch the life of your shoes.

Again, each shoe type is different but here are some ways you can make your various shoes last longer:

•    Let shoes rest: Most of you have more than one pair of shoes and this is great because ideally you should never wear the same pair of shoes two days in a row. By letting your shoes ‘rest’ you are allowing them time to breath and dry out completely should they be damp from moisture due to the outside or perhaps due to your sweaty feet.
•    Get driving shoes: Buy a cheap pair of shoes specifically for driving. The reason is simple; it saves your more expensive shoe’s lives. When you are driving your heel is constantly dug into the floorboard of your car and this can lead to your heel being pre-maturely worn out or even worse a broken heel should you be wearing high heels.
•    Shine shoes: If you have dress shoes or any other shoe that can be shined, then do so. This may sound like a daunting task but you can do it while you watch television and doing so will not only stretch the wearability of your shoes, but it will also keep them looking great all the time.
•    Try shoe repair: Many dress shoes can be repaired when the bottom sole or tap becomes worn. Yes it will cost you some money to have the shoes repaired but the cost is typically a lot cheaper than a new pair of shoes. And if you have been shining your shoes then a repaired shoe will look and feel as good as a new pair and best of all, they will already be broken in.
•    Dye your shoes: This applies for sneakers that are white. When they get old and dingy looking get some fabric dye and change the color. The end result will be a comfortable fitting shoe that looks new because you have changes the color.
•    Dry the wetness: This sounds silly, but so many people allow their shoes to get wet due to the rain and then simply allow the air to dry them. Bad move. Doing so will compromise the material of your shoes and thus weaken them with the end result being a pair of shoes that are worn out before their time. Combat this problem by making sure that you completely dry your shoes once they get wet. Some tougher shoes like sneakers can be tossed in the clothes dryer for a few minutes and others will require a more delicate touch. A great tool to have here is a hair dryer with adjustable heat settings.

Your shoes are like anything else you own in your wardrobe. If you neglect them they won’t be around for long, but if you give them proper care they will last you for many seasons to come.

Leather clothing

How to Repair Scratches on Leather Clothing

Leather clothing

Perhaps nothing looks as good as a leather piece of clothing. From a jacket to pants, you name it, nothing wears quite like leather. On the same token though, nothing looks worse than leather clothing that has scratches in it. While the deep scratches are extremely bad, event the smaller scratches can make even the nicest leather garment you own look dull and drab and can leave you so frustrated with a feeling of just wanting to throw them all away. So how do you repair scratches in your leather clothing?

There are a couple of ways that you can go about fixing your scratched leather clothing but probably the easiest way is to obtain a leather repair kit that can be found at almost any department store. Then you simply follow these four easy steps to once again make your leather look as good as new:

1.    Choose or mix your color:
The kit will contain different colored liquid adhesives as there are different colors of leather. If the kit does not contain the precise color of your leather garment then you will have to mix and match as best you can until you match the color of the leather piece you are going to repair. This may take some time but do not rush this step. If you use an adhesive color that is too off from the garment, then it will stick out like a sore thumb.
2.    Apply adhesive: Once you have the right color you then apply that colored adhesive to the scratches on the leather garment using a toothpick. Be sure to smooth in the adhesive and try not to apply too much adhesive because that will result in a high spot that won’t look right.
3.    Use grain paper: The kit will also contain a number of grain papers that are meant to look like the grain of your leather garment. Compare the way the grain looks on the paper to the grain on your garment and when you find a match lay the paper flatly over the adhesive you applied on the garment. This will leave the grain appearance so that no one will be able to tell that you used a repair kit.
4.    Heat it all up: The last step in the leather repair process is to use the heat applicator that also comes in the kit to properly bond the adhesive to the leather garment. Take the heat applicator and work it around on top of the grain paper in small circular motions for several minutes and be sure that the entire area is treated.

After the process is finished you need only let the area on the garment completely cool off and dry overnight and come morning you should have a great looking leather garment that no longer contains those nasty scratches. So before you give up on your leather goods simply because they have a few scratches, try one of these repair kits, the results may surprise you and the cost will be far less than going out and buying all new leather.

Hand wash

How To Hand Wash Clothes

Hand wash

Hand washing clothes is quickly becoming a lost art in today’s world. As wash and wear garments and more casual looks and fabrics have become more popular, more people than ever have wardrobes that are made up entirely of items that can be thrown in the washer and dryer. The big drawback with these types of clothing is that it limits you in the styles you wear and especially when it comes to delicate garments, fine fabrics and adorned outfits. Many such items need dry cleaning or hand washing in order to preserve their quality. With the high cost and inconvenience of dry cleaning proving to be stumbling blocks for many people, hand washing is the only remaining option. Knowing how to properly hand wash clothes will save you money and open up a whole new world of rich fabrics and clothing options that you’ve only dreamed of.

The true way to hand wash clothes is to start by spot treating any stains on the clothes, like you would if you were washing by machine. Fill up the sink, or a container big enough to hold your item and allow for agitation, with cold water. The cold water will prevent shrinking and color fading. Add laundry soap that is specifically formulated for hand washing in cold water. Be precise with the measurement as it will take a long time to rinse out excess suds if you add too much. When the soap is completely dissolved, add the item of clothing you wish to wash. If you have more than one item that needs hand washing, do only one at a time.

Move the clothing around in your soapy water gently in order to create mild agitation. This will allow the water to work through the garment loosening dirt. Pay particular attention to the underarm area, the neckline and any spots on it. Gently rub such areas with your fingers to remove stubborn stains and odors. When you are content that your clothing item is as clean as possible, you will need to rinse it. Using cold water only, rinse the item multiple times until no bubbles are produced when you add water.

With all the suds out of your hand washed item, it is time to dry it. Gently squeeze as much water out of the item as possible. Compress the fabric gently and do not twist it. Then using a heavy absorbent dry towel, lay the clothing flat and roll it up in the towel. Repeat gently compressing the rolled towel to get out excess moisture. Check the item’s label for further drying instructions. You may be able to put it in a cool dryer, hang it to dry or lay it flat to dry. Whatever the drying technique used, you will have sped it up considerably by getting the item as dry as possible before hand.

The alternative to true hand washing is to use your washer’s extra gentle cycle. It may even have a setting on it called hand wash. Be sure to use cold water and special detergent. This is a much more time efficient way to “hand wash” your items that need such treatment. However, one thing to keep in mind is that while the setting is very slow and gentle it is still a machine and the possibility for damage to your clothes still exists.

Learn to properly hand wash clothes now and enjoy the world of delicate clothes while saving money too.

Perfume stains

How To Remove Perfume Stains

Perfume stains

Perfumes are a wonderful way for people to add a special touch when they are getting dressed. Many people feel completely naked without perfume. For many individuals, their perfume is their signature and one of the must-haves before they are ready to leave home. With such a wide variety of perfumes on the market, there is literally something for everyone. Perfumes come in a mesmerizing blend of different scents and colors and have fascinating chemistry behind them. Despite the sexiness and complexity of perfumes, one simple thing remains as an issue for many people. Perfume stains clothing.

While we are always told to put on perfume while naked and let it dry before dressing, many people forget or neglect this advice. This means that countless individuals are left battling perfume stains when laundry time comes around. Knowing how to remove perfume stains will be a blessing for you if this is something you commonly have to deal with.

If you see that you have gotten perfume on an item of clothes, remove it right away and start stain removal techniques immediately. Getting to any stain as soon as it happens is the absolute best way to have a fighting chance at getting rid of it.

If the fabric of the item is silk, rayon or acetate, rinse it in water if it is indeed something that can be washed. By holding the item in cold running water you should be able to get rid of much of the stain. If some remains use glycerin and gently rub it into the spot. Rinse it again with more cold water. If you have still not completely gotten rid of the spot, use a weak solution of white vinegar and water. However, you should be very careful when using this type of solution. You may also want to pretest a hidden portion of the garment to check for color fastness. Rinse again with cold water before washing the item as usual.

If you have perfume stains on most other fabrics like cotton, linen, nylon, acrylic, wool, polyester, olefin and spandex, you will want to use a different stain removal method. Using a cloth that has been dampened, gently dab at the perfume stains to remove them working from the inside of the stain outwards. Be sure to place something absorbent underneath before you begin. Once the stain seems to be gone or at least, diminished, rinse the item in cold running water. Repeat the process until the stain is completely gone. If it continues to remain and the fabric is not acrylic, you can place a pad of rubbing alcohol on the stain to absorb it. It should soak up the stain and can be replaced with clean pads as necessary. When stain is gone, rinse well with water and wash as usual.

By knowing these top tips for getting rid of even the most stubborn perfume stains, you can feel confident in applying your perfume of choice, even if you’ve already dressed.

Water stains

How to Remove Hard Water Stains from Clothes

Water stains

When you wash your clothes in hard water you may not notice a difference in your colors but you will certainly see a difference in your whites. Hard water has the unique ability to make every white article of clothing you have a nice dingy color and depending on how hard the water actually is will depend on how dingy the hard water stains are. There are many products sold on the market today that claim to remove hard water stains, but many of them are expensive and most don’t work. So how do you remove hard water stains from your clothes?

Removing hard water stains starts before you ever touch your clothing. If you haven’t already you should have a water softener installed as this will keep the rust and calcium build up down and thus lessen the stains on your whites due to hard water. But really no matter what you do with hard water, there will be dingy hard water stains to deal with. Here is how you can get rid of these stains:

•    Use acid: This sounds a lot scarier than it actually is. The acid will actually eat away the hard water stains and if you use a mild acid it will not harm your clothing. Believe it or not you probably have that mild form of acid in your home right now as it is in the form of vinegar. To be effective you can spot treat hard water stains with the vinegar or to treat whites that are dingy you can fill your washing machine with water and add a good amount of vinegar and simply let the clothes sit for a few hours. Then turn on the washing machine and let it run its course.
•    Wash normally: Once you are done with the vinegar stage, leave the clothes in the washing machine and do a normal load. This is the point where you want to examine the detergent you are using. You can actually buy detergent that makes your hard water softer and if the detergent you have on hand isn’t so then you need to go get some. After adding the detergent, wash you whites as normal.
•    Bleach the load: Once washed again leave the load in the washer. Run another cycle but this time bleach your clothes. Of course you know to skip this step should you be allergic to bleach or you are washing colors.
•    Wash one more time: Using the special detergent you have just acquired give the whites one more washing.
•    Dry the clothes: Now that you have gone through that whole ordeal you can go ahead and dry the clothes as you normally would in the dryer.

Your clothes may not come out as white as new, but they will definitely be a lot less dingy than before you started. In addition to using the special water softening laundry detergent you can also from time to time use some vinegar in a normal load of laundry. This will help to fight the effects of the hard water and keep your clothes looking as hard water free as possible.

Laundry

How To Sort Clothes For Laundry

Laundry

Sorting clothes for laundry is something that most everyone needs to do. Not surprisingly there are a variety of ways to do so. Most sorting methods have valid points and things that others can learn from. By knowing a little about the different methods used to sort clothes, you can mix and match techniques to find the one that works best for you.

If you live alone or are in charge of your own laundry only, sorting clothes is very easy and tends to be not very time consuming. However, in a household of people with larger amounts of laundry, having an efficient sorting method saves time from this often-done chore. Some households have separate clothes baskets, hampers or bags in each room, where each person or people in that room store their dirty clothes. This is a good idea if you tend to wash children’s clothing separately from adult clothing. Alternatively, some households have a central dirty clothes depository. It may be one big bin, whereby everything must be sorted before laundry can begin. It may also be separate containers, one each for lights, darks or other categories of clothing.

If you are one of those households whereby everything goes into one place, sorting clothes for the laundry is a weekly or more often task. An easy and quick way to do so is to line up multiple laundry baskets and sort all the clothes at one time. By putting the clothing in a basket as you separate it, it is then ready to be transported to the washing machine once you have finished the sorting. Load number 2 will also be ready and waiting as soon as you’ve finished the first one. Alternatively, you can create piles of pre-sorted clothes on the floor on wash day so you can just scoop the next batch as needed. This is ideal if you do not have laundry baskets or have just one.

The simplest sorting method for clothes is to separate lights from darks. This eliminates the chances of dark colors bleeding onto light colored clothing and ruining it. This is the most basic of methods and should definitely be used by anyone who does laundry. If you choose to put all your clothes in a washer at once, sooner or later you will have the misfortune of ruining your lighter clothes.

Another method of clothes sorting that some people use is rather complicated and requires a little explanation. In this situation, darks are separated from lights. However, whites are completely separate to avoid becoming dingy from being washed with lights that have a little color in them. Separate whites also mean that chlorine bleach can be used whereas only color-safe bleach can be used with lights. Red colors are also separate, because reds are the main culprit in colors bleeding. Therefore they are best washed alone. Clothing requiring special treatment is another pile of clothes, to be hand washed, washed separately or dry cleaned.

Other loads of laundry consist of towels alone because they are too abrasive to be washed with other items. Bed sheets are a load to themselves because they must be washed in hot water. Kitchen towels, cloth napkins and tablecloths are yet another load, because even though they may be possible additions to the towels and sheets loads, some people don’t like the idea of fabrics used next to the body being washed with food related fabrics.

While not many people adhere to this rather strict method of sorting clothes, in reality most people have a combination somewhere between the basic method and the complicated method that works well for them. Try a few methods on for size to see which is best for you.

Milk stains

How to Remove Milk Stains from Clothes

Milk stains

Milk stains are a pain in the neck and always seem to come when you least expect it. Usually they come in the morning when you are in a hurry to get to work and are trying to wolf down a bowl of cereal as you head out the door. Then you get to work only to realize that you are wearing some of that cereal in the form of a nice little milk stain. If you are lucky the stain won’t be so noticeable, but most of the time there is no such luck.

Once you have gone through the embarrassment of sporting a milk stain on your garment for the entire work day you need to know how to remove that milk stain from your garment. Well fear not because removing milk stains is not all that challenging and can easily be done with what you have in your home right now. Here is what you do:

•    Scrape away: Use the dull side of a butter knife to scrape away any excess milk that you see. The milk will dry crusty and by removing the crust you can better focus on the worst part of the stain which will be left behind deep in the fibers of the garment.
•    Rinse the stain: After you have scraped away as much of the stain as possible you will want to rinse the stain. Use cold water in this step and let it sit for a good twenty minutes.
•    Pre-treat: Using Dawn dish soap or some other type of pre-treater, apply a small amount in the middle of the stain and rub it in vigorously. Rub for about five minutes to ensure that the entire stain gets treated. You can also use a brush in this step if you prefer but again be sure that the entire stain is being treated.
•    Soak: Now without rinsing the pre-treatment, put the garment in a bucket of soapy cool water and let it sit for a while. If you want to you can soak it over night as the longer it gets to soak the better.
•    Wash: After removing the garment from the soapy solution and wringing it as dry as you can you can now launder the garment as you normally would. Once the load of laundry is done remove the milk stained garment and do not dry it in the clothes dryer with the rest of the load.
•    Dry the garment: Hang the garment up to air dry and ensure that you have successfully removed the milk stain. If you have then you can treat the garment as you normally would and if it is not then you will have to repeat the process until the stain goes away. Typically milk stains are effectively removed after one or two treatments.

Milk stains happen, especially when you are in a hurry or if you have kids. But if properly treated your garments will live to be stained another day and who knows, maybe next time it will be an entirely different stain that will challenge you further.

Panty hose

How to Wash Panty Hose

Panty hose

Panty hose are an important part of any women’s wardrobe. Panty hose allow for a sleek and sexy look and really when you think about it, they make it possible for anyone to have nice tan and shapely looking legs. That being said, you can spend a great deal of money on your hosiery and it is important that you wash them with great care and wash them properly if you want them to last.

Unlike socks or other types of undergarments you have, you can’t just throw panty hose into the washer and let them go for a spin; well, you can but you will find yourself buying new hosiery on a regular basis if you do so. Follow these methods and you will ensure that your panty hose enjoy a nice long life:

Machine Washing

•    If you insist on washing your panty hose in your washing machine, be sure to go about it properly. You have to be sure to use a gentle soap and whatever you do make sure there is no bleach additive in the soap. Then turn the panty hose inside out and put them in a mess garment bag that zips at the top. Only wash your panty hose and nothing else and wash them on the delicate cycle. If you follow these procedures your panty hose should remain unharmed and the color should last in them as well.

Hand Wash

•    Even better than machine washing is good old fashioned hand washing. Simply fill up your sink with warm water and use some gentle soap in the water. Then wash to your heart’s content. Be sure not to wear any type of jewelry that could get snagged on the undergarments while you are washing them. It is alright to agitate the hosiery a little bit, but avoid pulling on them in any way as this will  stretch them out.

Drying

•    One thing you never want to do with your hosiery is to put them in a clothes dryer. This is a sure recipe for disaster and if you are going to do this, you may as well throw them into the trash can. Another no, no is to hang your panty hose up to dry. This will allow the fabric to stretch and will make for a looser fit. The best way to dry your panty hose is to lay them onto a towel and then roll the towel up. Once the towel is rolled up, use pressure and push down so the water is absorbed into the towel. Once the panty hose are merely damp, place them onto another dry towel and let the air take care of the rest. Be sure that the panty hose are laid out in a natural position and do not allow them to get bunched up as that can result in wrinkles forming during the drying process.

By the following morning your panty hose should be dry, great looking, and ready to go on you to make you look your absolute best.

Tomato stains

How to Remove Tomato Stains

Tomato stains

Tomato stains can come from so many different variables. Perhaps you had a nice hardy bowl of pasta with red sauce or perhaps you were drinking some tomato juice for your health. Whatever the case may be, these nasty red stains can ruin anything they get on. But they don’t have too. There are many stain lifters and stain fighting products sold today that may or may not work on the stains, but a home remedy exists that can have your clothes tomato free in no time.

Here is how you can rid yourself of these nasty red stains in the comfort of your own home once and for all:

•    Scrape the excess: Use the dull side of a butter knife to scrape away the excess sauce or any tomato that has crusted up due to drying. This will allow you to focus on the main part of the stain that will be in the fabric of your clothes.
•    Rinse backwards: Turn the garment inside out and rinse for five to ten minutes with cold water on the backside of the stain. This will help push the tomato stain out and again lightens the effect of the stain.
•    Soak garment: Fill up a bucket with warm water and a small amount of liquid detergent. Swirl the detergent around with your hand and then add the garment. Swish the garment gently around and then let it sit for a couple of hours. When the time is up remove the garment and wring it out the best you can.
•    Treat the garment: You can now treat the stain on the garment with any type of stain remover you like, but a very powerful one may be right under your nose without you ever knowing. This powerful agent is nothing more than regular baby shampoo. Use the baby shampoo and gently work it into the stain. Making sure that the entire stain is being treated you then let the garment sit for about fifteen minutes.
•    Soak garment again: Again mix warm water and liquid detergent in your bucket and let the garment soak for another hour or so.
•    Wash time: Once you again remove the garment and wring it out you need only wash it in your washing machine like you normally would. Once the garment is finished being washed is sure that you do not place it in your clothes dryer.
•    Dry the garment: Allow the garment to air dry and when it is completely dry you can check to be sure that the stain is totally gone. Drying the garment in the dryer before the stain is gone will result in the tomato stain getting set into the garment and will make removal all but impossible.
•    Repeat if you need to: Depending on how long the stain was allowed to sit before you had an opportunity to get to it will determine on the number of times you will have to go through this process. You may have to give two or three applications, but if you keep at it, the stain will go away.

One final word of advice; maybe leave the white clothes in your dresser the next time you are enjoying something tomato based.

Butter stains

How to Remove Butter Stains from your Clothes

Butter stains

With almost any type of food you eat butter makes it better. Butter can add flavor and taste to dishes that may otherwise not be for you. Really when you think about it, is there anything butter doesn’t make better? Well the answer is yes; clothes. Spilling melted butter on your clothes can be one of the most frustrating things you will ever do and no matter how many times you wash the garment it may seem that you can still see it. But good news, there are ways to remove butter stains from your clothes.

First of all you should never dry the butter stained article of clothing in your clothes dryer until the stain is gone because doing so will help set the stain. Once you have positively identified the butter stain here are some different tips to help you eliminate it:

•    Baking Soda:
As soon as you remove your butter stained clothing, take some baking soda and sprinkle it onto the stain and rub it in gently. This will help to absorb the stain and make it easier to wash. After letting it sit for a few minutes, rinse out the baking soda with warm water.
•    Pre-treat: Once you have used baking soda and rinsed it away it is now time to pre-treat your stain. Many people like to use a pre-treat spray like Shout but there are a couple alternatives that may work even better. Using Dawn dishwashing detergent is a great way to help combat butter stains. The reason is because Dawn is designed to remove grease when washing your dishes. Well, butter is a form of grease. Another pre-treater that works well is regular hair shampoo. Not only does it seem to work very well in ridding your cloths of butter stains it is also a lot more cost effective when compared to other pre-treaters. Either way, take your pre-treater of choice and apply a small amount in the middle of the stain and then rub it in for about five minutes. Let it sit for a few minutes more and rinse again with warm water.
•    Wash garment: Now you simply wash the stained garment with the rest of your cloths but you will want to use the hottest water possible in accordance with the garment itself. Once the garment is washed do not throw it in the dryer with the rest of the load.
•    Dry the garment: Take the stained garment from the load and allow it to air dry. The reason for this is to be sure that the stain is completely gone. Remember, if you put butter stained clothes in the dryer before the stain is gone you will risk setting in the stain permanently.
•    Repeat if necessary: The stain should be gone by now but if it isn’t, simply repeat the process. Some stains are going to be more stubborn than others and may require an extra treatment or two.

Though the process may seem lengthy, it really doesn’t take all that long to accomplish and the end result may just be one of your favorite garments being saved.

Wool

How to Care for Wool Clothing

Wool

Wool clothing can keep you warm and look great all at the same time. If you want your wool clothing to last for a while it is important to know how to care for them. While not as easy to care for as your everyday garments, the care of wool clothing is not all that hard so long as you go about it in the proper manner.

Here are some tips that will help you to properly care for your wool clothing and ensure that they will look great for years to come:

•    Fuzz balls: The one thing about wool clothing is that it can and does develop all sorts of little fuzz balls that can make it look terrible. You can try to brush these fuzz balls away with a lint brush or pick at them if you are totally bored but there is an even easier way to deal with them. They now sell a ‘de-fuzzing’ hand-held machine that was created especially to deal with these little pests. They are not expensive at all and obtaining one and using it regularly will keep your woolens looking their best.
•    Cleaning: Most wool clothing is dry-clean only, but you can wash these articles of clothing by hand. The key is to be gentle and always towel and air dry only. Never use a dryer and wash one article of clothing at a time.
•    Hanging up: If you have a nice wool sweater, take care of it when hanging it up. Use a hanger that has padded sides and be sure that you place that sweater inside a garment bag that zips up. You should use a fabric garment bag so that the wool has a chance to breath as opposed to a plastic garment bag which will not allow for any breathability.
•    Storage: When it simply becomes too hot to wear your wool garments you will want to store them. The big thing with wool is that there are insects that just love it and will ruin your favorite woolens if given a chance. This can be combated with cedar. The perfect place to store your woolens is in a cedar chest. If you don’t have a cedar chest then get a plastic container with a lid that hold tight and place your woolens in the container with a mess back that is full of cedar chips. Once it is time to again wear your wool clothes, you will want to take out the clothing and allow it to air out for a couple of days to avoid smelling like you just walked out of a forest.
•    Before you put it on: Before you even put on your woolens you can help care for them by observing a few simple rules. Never apply make-up, hair spray, or colognes and perfumes while wearing your woolens as these things can cause nasty stains. Apply and let all of these things dry completely before you dress in your favorite wool clothes.

Caring for wool is a bit more time consuming than other articles of clothing you own, but when properly cared for you will enjoy them for many seasons to come.

Pickle stains

How to Remove Pickle Stains from Clothes

Pickle stains

Pickles make the perfect side dish for a number of main courses. Sometimes there is nothing more enjoyable than these crunchy little delights. Pickles are great as you can eat them whole or cut them up and put them on a burger or sandwich. But these tasty treats can leave a nasty stain when pickle juice is dropped unknowingly onto your clothes. Doing so can leave you with a green mess that just doesn’t want to come out. But fear not, there is a solution.

Pickle stains can be a pain in the neck, but by following these tips you will be able to get your cloths as clean as new:

•    Rinse the stain: The first thing you want to do is to rinse the stain thoroughly with cold water. Run it under the water for a good five minutes or so and then let it sit for about twenty minutes.
•    Soak the stain: Next mix a bucket of warm water with some regular clothes detergent and after agitating up the water soak the garment in it for a few hours. If you want to you can leave it in overnight as the longer it soaks the easier it should be to remove the stain.
•    Pre-treat: When you are done soaking the garment take it out of the soaped up solution and wring it out. Then go to the stained area and sprinkle on some powdered laundry detergent. Get a brush and gently scrub the stain in a circular motion for about five minutes. You can also go with a number of expensive stain pre-treaters that they sell at the department stores but these days it is wise to save money wherever you can.
•    Soak again: Mix the same warm water and detergent solution that you did before and again let the garment soak for a while. This time it is not necessary to leave it in over night, but you should let it soak for at least a few hours.
•    Wash the stain: Take the garment out of the soak mix and wring it out again. Now you need only put the garment in your washing machine as you normally would and put it through a normal wash cycle. You should try to use the hottest water allowable by the garment.
•    Dry the garment: Once the garment is washed remove it from the rest of the load and do not dry it in the clothes dryer. Instead let it hang up to air dry so that you can be sure that the pickle stain is completely gone.
•    Repeat if you have to: If the stain remains you will have to repeat the process another time or two. While pickle stains are more common than you may think, they aren’t the hardest stains to get rid of and are usually removed within the first couple of applications.

As you can see removing pickle stains really isn’t that tough, so feel free to enjoy as many pickles as you like and don’t fear the occasional stain.

Suede

How To Protect Suede From Stains

Suede

Suede is a beautiful fabric that is very versatile and trendy. It is used in a variety of clothing from jackets and coats to shoes, skirts, pants, shirts and purses. It is a great choice for when the temperature calls for something a little warmer in the spring and fall. It also makes for toasty winter wear. The one drawback with suede is that it stains easily and is hard to clean. It even stains when water gets on it. Therefore knowing how to protect suede from stains is very important information that anyone who has suede clothes, shoes or accessories should know.

The most important thing you can do to protect your suede items from stains is to apply a commercial suede treatment/protective spray. This formula comes in a can and is easy to apply by simply spraying it on the item. Be sure to do so in a well-ventilated area. Let it dry before wearing the item. Apply the treatment when the item is new, at the beginning of each season when you will wear the item and as often as necessary in between. Following dry cleaning, it should also be reapplied.

Certain preventative methods will help you keep your suede from getting stained. Never apply perfumes, hair sprays, deodorants or other aerosols while wearing suede. If your suede garment touches your neckline, wear a scarf with it to keep makeup and oil from the skin from staining the suede. If your suede gets wet, it is best to dry it gently with a clean towel as much as possible. When you have removed all the moisture that you can, let it air dry before using a suede brush on it. For dried on stains like mud a suede brush is a good way to remove them.

Deal with small stains immediately to prevent them from becoming bigger more permanent stains. If you have an oil-based stain on suede apply talcum powder to soak it up and then brush the suede afterwards. Many other stains can be removed by used a white pencil eraser or a sandpaper-based emery board for fingernails. Be gentle when using either method and brush with a suede brush afterwards. Remember to keep an eye out for stains when you remove your suede items and treat any stain promptly. As with stain removal in general, the faster you deal with a stain the better the chances you have of keeping it from becoming permanent.

Seek out a reputable dry cleaner or leather expert who has a good reputation for dealing with suede. He or she should also be able to speak confidently about what you can and cannot expect from cleaning such items. Talk to several before deciding which one to use. Seek referrals from others who frequently wear suede.

Keep your luxurious suede items from becoming stained with a little prevention on your part and the knowledge of how to deal with spills and liquids so you can prevent them from becoming permanent stains. This knowledge is extremely valuable to the longevity of your suede wardrobe items.

Food and smoke

How do Clothes Absorb Smells like Food and Smoke

Food and smoke

How many times has this happened to you? You go to your favorite restaurant and have dinner. On your way home you realize that your clothes now smell like what your main course was. Or even worse, you visit a friend who is a smoker and you are only there for a handful of minutes. When you walk outside and get into your car you are disgusted to find that your clothes now smell as nasty as an ashtray. Why is this? Why do clothes absorb odors?

Clothes can absorb so many smells and odors, some that are more desirable than others. The reason for this is that clothing is made of material that has somewhat of an absorption property. Just like a sponge will absorb water, so too will clothing absorb smells. Here’s what it depends upon:

•    Material: Have you ever noticed that some articles of your clothing absorb odors more than others? This is because of the different materials that the clothing is made up of. It also has to do with the way in which those materials are put together. When you sit down to eat a piping hot plate of pasta with red sauce and garlic all over it, the steam will be all over the place. This steam is also going to contain the odor of the dish you are eating and this is what gets absorbed into your clothing. Your cloths actually act like a net as the fabrics are very finely woven together and this allows some of the odor to pass through, but it will also catch a significant amount of the odor as well. This will literally have the odors, ‘stick’ to you clothing and make them just a bit damp, even though you may not realize it. Once the clothing is dry the odors are left behind for all to smell. This is how you can get that nasty B.O. smell stuck in the arm pits of your shirts if you aren’t wearing anti-perspirant.

•    Your chemistry:
If you an individual that perspires quite a bit you will allow your clothing to be damp at many different points throughout the day. The damper your clothing is the tighter that net of woven fabric will be and thus the more odors that will be absorbed. Remember, once the clothing is dry the odors are left behind.

•    Environment: Some things stink more than others. That said, the type of environment that you are in is another reason your clothes will absorb odors. With food, if something is spicy or has a lot of garlic, there will be more odors produced. In your home, there will be more odors if you are a smoker or you have animals like dogs or cats. As your clothing gets whisked through the air by you moving around it will naturally absorb those odors in the environment. This explains why cloths seem to smell so much better when they are hung outside to dry. The environment is fresh air, flower, grass, and sun. That is what gets absorbed and thus it smells good.

Whether you like it or not, clothes will always absorb odors and all the cologne and perfume in the world can’t cover up certain smells. Remember, a cleaner environment equals cleaner smelling clothes.