Tag Archives: t-shirt how to

Baking soda

How to Soften and Whiten Laundry by Using Baking Soda

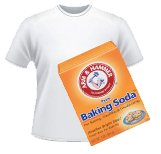
Baking sodaBaking soda is an inexpensive substance that is easy to find in any grocery store and general merchandise store. It has a million uses in the home, but one of the most useful of these is likely its power to soften clothing and make white clothes whiter. If a home has hard water, baking soda is especially helpful in keeping clothing from becoming stiff from the hard water residue.

Baking soda is a mildly alkali substance, making it a perfect natural detergent. It doesn’t come with any harsh chemicals like artificial fragrances and it is generally safe to be used by people with sensitive skin. There are several ways that baking soda can be used in the washing machine to make clothing softer and to whiten whites.

One of the easiest methods of using baking soda to keep clothing softer and brighter is to add about half a cup of baking soda during the rinse cycle. This works in much the same way that a liquid fabric softener would work in the wash.

Another way to use baking soda is to use it as a part of the detergent. This is done in order to brighten clothes and keep the whites looking whiter. This can be done by simply substituting a cup of baking soda for the detergent you would usually use. This can also be done by using baking soda as a part of a homemade detergent. By mixing a ¼ cup of baking soda with ½ cup of white vinegar, you can make an effective washing liquid that will treat most stains but will leave clothes softer than if a regular detergent is used.

A pre-treat solution can also be used for whites that will keep them brighter. Mix ½ cup of white vinegar with ½ cup of ammonia and ¼ cup of baking soda. Mix in about two quarts of water and two spoonfuls of regular liquid hand soap and you will have an extremely effective pre-treat solution that can be used for treating whites before they are washed. To use this, the solution can be sprayed onto the clothing stains and left to soak for about 10 minutes before washing. Or, the clothing can be rinsed in the solution before being rinsed with water and placed into the wash. This will work to keep white clothes brighter than if they

If you are using bleach to whiten whites, it can make clothing somewhat stiffer than regular detergent. To counteract this effect, add a little baking soda into the bleach to keep the clothing softer. This will also give the bleach a little boost and will result in even whiter whites.

To work on tough stains on whites, scrub the area with baking soda. To do this, make a paste from the baking soda a little bit of water. Take the paste and scrub it into the stain with a small scrub brush or an old toothbrush. Avoid scrubbing too hard, however, or you may scrub a hole into the fabric. Once this is completed, wash the clothing as usual.

Ninja mask

How to Make a Ninja Mask Out of a T-Shirt

Ninja mask

Need a quick costume? Need a very cheap costume? Just want to have a little fun and amuse your friends with your t-shirt skills? It doesn’t get much cheaper, easier and more impressive than making a ninja mask out of an ordinary t-shirt. A quick t-shirt ninja mask can be made any time and in any place. If you’re running late and need a costume for a party, you can make it on the way to the party- as long as you’re not the one who’s driving. The mask can be made with any color t-shirt, though a black or dark-colored t-shirt will usually look the best.

If you have a black, white, or dark-colored t-shirt that has printing on it, it is possible to arrange the t-shirt so that the printing doesn’t show when it becomes a ninja mask. The easiest way to do this is simply to turn the t-shirt inside out so that no part of the printing shows. The seams may show once the mask is completed, but ninjas do tend to get their own way. Maybe you’re a ninja who wants the seams to show.

Hold the t-shirt up against the front of your body. If you want the eventual result to be an inside-out t-shirt, keep it turning outside out. If you want the completed mask to be outside out, turn the shirt inside out before you begin making the mask. The t-shirt should be turned around so that the tag is on the side that’s farthest away from you.

Then, pull the shirt upward as if you were going to put it down over your head. Instead of putting your head through the neck hole, pull down on the neck so that your face is sticking through the neck hole. The neck of the t-shirt should be all the way around your face.

Take a sleeve in each of your hands and wrap each sleeve all the way around. Each sleeve should come around the back of your head. The sleeves can then be tied together in one knot that will be in the middle of the back of your head. Pull the top of the neck hole down over your forehead. Then, fold the top part of the collar upward so that the neck isn’t hanging in your eyes. This folded area can be moved down to sit at eye-brow level. This will give you a slightly menacing look and will be an important part of your ninja mask.

Take the bottom part of the t-shirt’s neck hole and pull it upward until it covers your nose. If the tag of the t-shirt is at your nose, everything is in the right place. To hide the tag, fold the collar over it. This will keep it out of the way and your new ninja mask looking fierce. If you have trouble with folding the tag under, try trimming the tag down as low as you can first. This will make it easier to conceal it and easier for you to look like a convincing ninja.

How to Remove Rust Stains From Your T-Shirt

Rust stains are the perfect way to ruin clothes- they are unsightly, difficult to get out and they are extremely noticeable on most t-shirt colors. It may be tempting to throw out a t-shirt that has rust stains on it, but there are ways to remove those stains and keep the t-shirt.

If the t-shirt is white, the stain is especially noticeable. But, it is also easier to get rid of. There are quite a few substances that will get rust stains out of a white t-shirt without staining the fabric. One of these is lemon juice. This ingredient is highly acidic and should be used in the smallest doses that will get the stain out. If a t-shirt is allowed to sit in large amounts of lemon juice for long periods of time, the fabric will be weakened and it may become stained.

To use lemon juice correctly, put the t-shirt into extremely hot water and then sprinkle the stained area with lemon juice. Rinse the t-shirt and then sprinkle it again if needed. This should remove any rust marks from a white t-shirt. It may also work for rust on a colored t-shirt, but it should be tested against the color to make sure it won’t change the color first. To do this, apply a few drops of lemon juice to the inside part of the hem and watch for any color change.

Lemon juice can also be used along with salt for rust stains that are more stubborn. The salt is sprinkled over the rust stain and the lemon juice is them rubbed into the area. This gives the lemon juice some friction and will remove larger, deeper stains that water and lemon juice alone. Once this has been done, rinse the stained area in hot water and use the salt and lemon juice again if any sign of the rust remains.

Another common household item that can be used against rust stains is called cream of tartar. This is a powdered substance found in the spice aisle of grocery stores. Usually used in dessert recipes, it can also be used to raise rust out of fabric. To use it, mix about a cup of water and three teaspoons of the powder together. Boil this mixture to create your stain fighter.

Place the stained area of t-shirt into the boiled mixture. You can also pour boiling water over the stained area and then sprinkle cream of tartar over it. Then, rinse it away with more boiling water. Try the colorfast test on a colored t-shirt to make sure it will not stain the shirt before using this method.

Another method is to use hydrogen peroxide on the stain. This can be done by dipping a cotton swab into the solution and then dabbing it onto the stain. You can let it sit for a few minutes or you might try brushing it into the fabric with an old toothbrush. Once the rust starts to fade, rinse the peroxide away and wash the t-shirt as you normally would.

How to Make a T-Shirt Feel Worn

A t-shirt is an article of clothing that is unlike many other garments. The more worn it feels, the more comfortable the t-shirt will be. Like a worn pair of jeans, there are few things that are quite as comfortable as a t-shirt that feels nice and worn. The t-shirt can be made to feel more worn than it is in a number of ways. It can also be made to feel less stiff by avoiding some types of garment care.

If a t-shirt feels stiff, it might be getting the type of care that makes clothing feel less worn. This may include spray starch and ironing. If you want the t-shirt to feel more worn, don’t iron it and throw away the starch. Starch has never made anything feel more comfortable.

And as far ironing: don’t. Most t-shirts don’t wrinkle anyway. If they do happen to have a few wrinkles, they will smooth out as the t-shirt is worn. Ironing a shirt makes it feel a little stiffer and not as if it was well worn. Washing and drying is all the care that a t-shirt really needs most of the time.

For a little extra comfort, always use fabric softener when you wash your t-shirt. This gives it an overall softer feeling and makes it feel as if it has been worn many times. Some washers have an area where a liquid fabric softener can be added and released slowly over time. There are also liquid fabric softeners that can be poured directly into the washer along with the detergent.

For the dryer, use a fabric softener sheet. These are placed in the dryer with the wet clothes and thrown away after the clothes are dry. A dryer sheet will leave the t-shirt feeling soft and comfortable every time you use it.

To keep the t-shirt feeling soft, also be sure to use the correct amount of detergent. Using too much can leave a heavy film on the clothes that will make them feel a little heavier and not as soft. A shirt that is clean but not full of soap has a much nicer feel.

Some people like to stone wash their t-shirts. This can be done by actually washing it with a rough stone, but more often it’s actually done with sandpaper. Rubbing the t-shirt with large-grain sandpaper will very quickly make it feel worn. Simply lay the t-shirt flat and rub it in an up-and-down motion all over the t-shirt.

Perhaps the most effective way to make a t-shirt feel worn is to wear it. Wearing it often, even under other clothing, will make it worn and comfortable in no time. Wear it, wash it and throw it in the dryer and it will become more worn than if it were worn rarely and kept in a drawer. And, the great thing about a t-shirt is that the more you wear it, the more comfortable it is. So don’t leave it in a drawer- get out there are wear it.

Makeup Be Gone! Tips on Removing Makeup Stains from Your Favorite T-Shirt

Let’s face it – we’ve all had this happen to us at some point or another. You’re getting ready for a big night out with a new date, or a fun day of shopping with your best girlfriend, when suddenly – whoops! Your makeup has gone from on your face to all over your most treasured t-shirt. As if that isn’t bad enough, you only have five minutes remaining until your friend or date shows up. If this has happened to you, don’t panic! There are simple and inexpensive tricks to use that can easily remove any makeup stain from your t-shirt – and many of the items you may already have stashed in your fridge or beauty cabinet. So before you decide to change your t-shirt, try a few of these shortcuts and watch how quickly those stubborn makeup stains will disappear!

Grab a makeup sponge or a slice of bread.
No, you’re not going to be making a sandwich. Makeup sponges and bread (white works best) are some of the most effective materials for erasing stubborn makeup stains, as they act as natural absorbers that soak up oil and powder. Gently rub the sponge or slice of bread on the makeup stain for maximum effect. Makeup sponges are also highly effective against dreaded deodorant stains, so make sure to always keep a stash in your purse!

Raid your kitchen cupboard.

Is that stain still refusing to give up without a fight? Head to your kitchen cupboard and grab a bottle of white vinegar and a light-colored washcloth. Pour just a bit of vinegar onto the cloth and gently dab at the stain until it completely disappears. Remember, vinegar should not be used on cotton material, so be sure to check your t-shirt’s label before using this method!

Get out the shaving cream.
Sounds peculiar, but shaving cream (not gel) is one of the most effective stain-fighters out there. Apply a bit of cream to a light-colored cloth (remember to never use dark colors, as this can bleed into your t-shirt’s fabric) and dab at the stain. Once you’ve completely covered the stain with shaving cream, rinse it out with a bit of club soda. Club soda acts as a great stain remover, but if you don’t have any on hand, water is fine as well. Be sure not to dry out your t-shirt until the stain is completely removed, as this can cause the stain to set in.

When all else fails…
If these neat little home tricks haven’t worked, grab a stain-remover pen (you can find them at your nearest pharmacy or grocery store) and dab the tip onto the stain. Be sure to follow all directions for maximum stain-fighting power.

As you can see, makeup stains don’t necessarily spell doom for your favorite t-shirt, especially with all the home remedies and stain-fighting products that are available today. All it takes is a little creativity – and a bit of patience! – and that stubborn makeup stain will disappear in no time at all!

How to Stencil a T-Shirt

T-shirt stenciling is a fun way to quickly customize a shirt. It can be a way to make a very complicated image into a t-shirt picture, or a way to design a t-shirt by using simple shapes. Many people use stencils on t-shirts to customize it with letters and numbers.

Letters and numbers are simply to stencil onto a t-shirt. Stencils are available in any craft store, or you can make your own. All you need is a sturdy cardboard cut out of each letter or a plastic stencil for each. The stencils are placed in their desired arrangement on the t-shirt and then marked in place with a pencil.

On ready-made stencils, there are small cut-out points where the end of a pencil will fit through. Use these points to mark the placement of each stencil. This will allow you to line up the stencil again if it gets bumped or moved, or if you need to come back and redo the stencil with another color. It will also allow you to line up individual letters and numbers to make sure you are stenciling them in a straight line. This is a much more accurate method than simply eyeing the letters and will result in much straighter rows of numbers and letters.

If you’ve made the stencil yourself, simply mark the t-shirt along the outside edges of the stencil. This will allow you the same security as a ready-made pencil point. The pencil markings will wash away easily as soon as the t-shirt is laundered.

For more complicated designs, you can use a ready-made stencil that is meant for wall painting, or look in stencil books. Stencil books have many cardboard stencils to choose from and make it easy to find several designs with the same theme. These are punched out of the book and are used in much the same way as letter stencils. Lay the stencil on the shirt and mark it with a pencil before starting. Then, use your medium of choice to fill in the stencil.

For t-shirts, many people use markers because they are easy to write with, have a precise tip and come in a wide variety of colors. A permanent marker will work on a t-shirt, or use fabric markers. Either type can be used to fill in any stencil with solid color.

Another option is fabric paint. These paints are specifically designed to stay on fabric and not wash away. When using fabric paints, paint from the outside of the stencil to the inside, working toward the center of each area to be stenciled. This lessens the chance of the fabric paint slipping underneath the stencil and making the design blurry.

Use a small brush, even if the area to be stenciled is large. This gives you more control over where the paint goes and will keep the design neater. Most paints require setting the paint with an iron or drying it in a clothes dryer before wearing the design. Follow the directions of the individual paint type and you’ll have a t-shirt that is permanently painted with your handiwork.

Rolling Your T-Shirt Is a Great Way to Go

Of all the different methods of preparing your t-shirts for storage or packing, you might find that rolling them is the best. Folding t-shirts can have its disadvantages, especially the tendency to create creases in the t-shirt. Also, folding t-shirts is not the most practical method when you need to pack them in a suitcase.

But there are many good reasons why rolling t-shirts is such a good method. First, rolling t-shirts saves space. Also, rolling them can help prevent wrinkles when packing. When stored in a dresser drawer or open shelf in your closet, t-shirts that are rolled look really neat and uniform. Rolling works especially well for t-shirts, because they’re made of a thin, stretchy fabric. This method doesn’t work as well for bulkier items or stiffer fabrics such as jeans or sweatshirts.

The best way to roll a t-shirt is to follow these steps:
1) Lay the t-shirt on a clear surface with the front of the t-shirt down
2) Fold each sleeve towards the center of the t-shirt so that it’s shaped like a rectangle
3) Roll the t-shirt from bottom hem to neckline, making sure to keep it even and tight
4) You now have a neatly rolled t-shirt, which you can keep as is, or secure with a rubber band around the middle in order to ensure that it won’t unroll in your luggage.

It is possible to stack many t-shirts or t-shirts and other items of clothing in one big bundle, and roll them all together. However, the most practical way to roll t-shirts is to roll each t-shirt individually. That way, if you’re on vacation, and you just need to get one t-shirt from your luggage, you only need to unroll that one. Otherwise, you’d have to unroll, restack, and re-roll all the clothing in the bundle. Also, when you roll each t-shirt individually, you can take advantage of little pockets of space in your luggage that might otherwise be wasted. As a result, rolling t-shirts can go long way towards helping you be able to carry a smaller suitcase or fewer pieces of luggage.

However, if you’re preparing for a long trip, and plan on unpacking your suitcase once you get to your destination, it can work well to roll your t-shirts and other clothing in bigger bundles. This method works especially well if you roll a bundle of items that are the same size, such as several t-shirts. When you want to roll t-shirts in a large bundle, with other t-shirts or different garments, one way you can protect them even further from wrinkling is by placing the whole bundle in a large garment bag before rolling.

There are lots of gadgets on the market to help you save space and prevent your clothes from wrinkling in your suitcase. But once you know how to roll your t-shirt, you have a great way to save space and prevent wrinkling that’s easy and completely free.

How to Remove Oil from Your T-Shirt

Oil and fabrics are never a good mix. Oil can stain clothing faster than just about anything else that touches it. And t-shirts, being made of breathable cotton, can be especially vulnerable to it. Fortunately, there are a number of things that can be done to take out the oil before it permanently damages the t-shirt. If caught in enough time, there’s no reason that an oily t-shirt that looks hopeless can’t end up looking as good as new.

One home remedy that many use against oil is shampoo. A baby shampoo can be used if the stain is mild, or a harsher shampoo can be used if the stain is more severe. The shampoo should be rubbed into the stain for a few minutes and then rinsed out with warm water. The t-shirt can then be washed in the laundry as usual. The oil should run out of the shirt and leave it looking like it did before.

If that doesn’t work for your particular oil spot, try a dishwashing detergent. It may sound strange, but a liquid dishwashing soap may be the most effective thing you can use on a tough oil stain. Dishwashing detergents are made to cut the oil that is left behind on pots and pans and to allow it to be rinsed away. This same principle can be used for your t-shirts. The dishwashing soap can be applied in much the same way as the shampoo- rub it into the oily area, rinse it away and then wash the shirt as you normally would.

If the stain is particularly tough, try changing the way you apply the dishwashing soap. Instead of rubbing it into the fabric of the t-shirt, scrub it into the fabric with an old toothbrush. Use a toothbrush with soft bristles to avoid damaging the fabric or causing too much wear to the oily area.

If either of these methods doesn’t work for a stubborn stain, combine one or both of these methods with a hot-water soak. Add some shampoo or dishwashing soap into the water and allow the t-shirt to soak for about half an hour. Then, take the t-shirt out and wash it in the washing machine.

Baby powder is another home remedy that many people swear by. The powder soaks up the oil which can then be removed when you remove the baby powder. The problem with baby powder, however, can often be the smell that is left behind. It may also stain dark t-shirts. If you want to try it anyway, use cornstarch instead. This has a similar effect but will not leave the same strong scent behind. It is also less hazardous to those with asthma or other respiratory problems as talc can be.

Whichever method of oil remover you decide to use, never put your clothes into the dryer until you are certain the stain has come out. Drying clothes in the dryer will set the stain and make it far more difficult to remove.

How to Pack T-Shirts without Wrinkling Them

Most t-shirts generally don’t wrinkle too badly when kept in a drawer or a closet. However, when the t-shirts are packed, it’s a different story all together. The tightly-packed atmosphere of a suitcase or duffel bag can mean that the t-shirt will come away with a large number of wrinkles if it is not packed correctly.

Packing a t-shirt the right way is mostly a matter of folding them correctly and placing them into the suitcase the right way.  The folding can be done in one of two ways. The first and most common way is to fold the t-shirts so that there are the fewest number of creases possible. The creases should mainly happen where there is a seam. The sleeves can be folded at the seam and placed behind the front of the shirt. The whole shirt can then be folded once across the middle to minimize the amount of creases and wrinkles.

The best way to make sure that the t-shirt is not wrinkled at all is to pack the folded t-shirt in a suitcase or bag that is not overfilled. Just about anything that is packed in a stuffed suitcase, no matter what type of fabric it’s made of, will wrinkles. The weight and pressure of too many items in the suitcase will force harder creases and wrinkles into the clothing. It will result in wrinkles in the t-shirts as well as everything else in the suitcase. If you have a lot of things to pack, carry an extra bag to prevent the items being smashed together too tightly.

The other way to pack t-shirts is a less common way to do it, but it can result in zero wrinkles if done correctly. The folding is actually done by rolling the t-shirts instead of the traditional fold. Lay the t-shirt out flat in front of you and start at the collar. Continue to the end, rolling the entire shirt into a loose roll. Rolling it too tightly can leave a few wrinkles in it. But, like the other folding method, wrinkles can be pressed into the t-shirts by packing them too tightly into the bag.

The rolling method of t-shirt folding is not only good for preventing wrinkles, it is also a good space saver. It reduces the amount of space needed for the t-shirts and enables them to be packed into the odd-sized spaces left in the suitcase. Just don’t be tempted to fill in the extra space with too many new items.

Some people also use tissue paper to put a little extra space in between their items. A sheet or two of tissue paper can be placed on top of each item to give it a little more cushion. This prevents the t-shirts from becoming packed too closely to other items and coming away with deep creases.

For another layer of insurance, use a hard-sided suitcase. This ensures that the items in the suitcase won’t be smashed by rough handling or by being stored too closely to other suitcases. By taking a little care, you can ensure that the t-shirts arrive at their destination wrinkle-free and ready to wear.

How to Make Your T-Shirt Soft

T-shirts are so popular because they are comfortable, easy to wear and are likely one of the softest items of clothing you own. The soft, combed cotton that is used for t-shirt has a feel that is unlike any other. There are some types of clothing care, however, that can take away some of that softness. If your t-shirts are starting to feel a little stiff or if you just want to make sure that they never end up feeling that way, there are several ways to take care of it and ensure a softer t-shirt.

Fabric Softener

Using a fabric softener may seem like a simple thing, but there are an enormous number of ways to use it. There are the well-known dryer sheets that can be added to the dryer along with the wet clothes, but there are a number of other types. There are fabric softener balls that are added to the washer. These balls add a liquid fabric softener into the wash at the right time. Another way to use fabric softener is to pour in a liquid type that is poured in during the rinse cycle.

Drying

The key to the softness of any item of clothing is usually the way it has been dried. Line drying a t-shirt will leave it far stiffer than putting it through a dryer cycle. Many people choose to use line drying anyway because of the energy savings or the cost of a dryer. Some simply prefer the way clothing smells after it has been line dried. If you like line-drying your t-shirts, try using a quick 5-minute drying cycle after the t-shirts are mostly dry. This will result in a t-shirt that has still saved energy and still has the smell of line-dried clothing, but it will have the soft feel of t-shirts that have been dried in a dryer.

Softening the Water

If your clothes aren’t getting softener, it may the water itself that needs softened. If you have hard water, it can take a serious toll on your clothing every time it’s washed. To soften the water, add a little bit of vinegar into the washer during the rinse cycle. Some people also use two rinse cycles when washing their clothes to ensure that all of the soap has been removed and to make sure that the vinegar is having an impact on the t-shirts.

To make sure that any t-shirt doesn’t get hard again, also make an effort to keep it clean. Some t-shirts may harden when they are left dirty for long periods of time. Sweat, body oils, dirt, deodorant and other substances can harden the fabric if they are left on it for too long. Wash t-shirts as they become dirty and then make sure to take a step or two to ensure that the wash will lead to softer t-shirts. This will ensure that the comfort of a brand-new t-shirt goes on and on, even when the t-shirt has been worn and washed many times.

How to Stretch Your T-Shirt

We’ve all got that one t-shirt that would fit perfectly if we could just stretch it out a bit. Chances are, your t-shirt fell victim to one of the most common culprits, the washer and dryer. Or, maybe you bought it a little too small because the t-shirt was unique or too good a deal to pass up but the store did not have quite your size. Whatever the reason for your ill fitting t-shirt, it’s time to stop looking in your closet, pulling out the t-shirt, and putting it back. Stretch that baby and give it some wear time!

There are a couple methods for stretching a t-shirt that can be used when either the garment is wet or dry. The first one involves simply trying to stretch the t-shirt by pulling on it. While most people may try just tugging on the shirt in its poorly fitted places when it’s dry and on their body, this method isn’t usually successful. In fact, if your t-shirt has graphics on it, it may distort them and give away your attempt to stretch your t-shirt. Stretching a t-shirt while it is wet is most successful.

The first step after wetting the shirt is to lay it on a flat surface and start pulling gently on the fabric in the areas that you need to stretch out. You should pull lengthwise and crosswise during your stretching process. After you’ve stretched out the wet shirt, hang it to dry. A second tactic to use while the t-shirt is wet is to stretch it with an iron. The heat setting of the iron should be on a low to medium. Gently run the iron over the problem area pushing out the fabric lengthwise and crosswise. As with hand stretching, hang the t-shirt to air dry. A final method that can be attempted is to use your iron on a dry shirt using the same technique as above. This method however is likely to only be successful in situations where limited stretching is needed.

Having a larger sized family member or friend put on your shirt and wear it may sound like another option for stretching out your t-shirt. However, you’d better think carefully before you choose someone to help you out with this! If the size differential between you and your friend or family member is too great, you’ll ruin your shirt. However, if the differential is not great enough, you may get little or no stretching. Therefore, depending on how much the shirt needs to be stretched and if you have the right individual to utilize for the process, this idea may work. However, you may undo all your stretching work when you wash the t-shirt prior to wearing it yourself.

Are you ready to take on stretching that t-shirt and make it fit properly? Then drag it out of the closet and figure out just how much stretching you’ll need to do to achieve the fit you’re after. Just remember – the stretching techniques used for wet shirts work best for t-shirts that need a whole lot of stretching. Finally, remember each time you wash your t-shirt you might need to repeat the whole process to get that perfect fit again. Happy stretching!

How to Remove an Itchy T-Shirt Neck Tag

An itchy tag is something that can be an annoying part of any day. Trying to shop or carry on a conversation while trying to reach for an itching tag is no way to go about your day. There are a number of ways that an annoying tag can be dealt with, however.

To get rid of an itchy tag, many people reach for the scissors. This can have one of three outcomes. The tag can be cut short and become even itchier, it can be cut even shorter and become comfortable or a hole can be cut in the neck of the t-shirt. Because all tags are not attached the t-shirts in the same way, taking the same approach to removing every tag can result in severe damage to the shirt. To remove the tag the proper way, take a look at how the tag is attached. Only after the tag and the stitching have been evaluated should you actually try to remove the tag.

There are tags that are sewn into the shirt with the same line of stitches that holds the seam together. For these tags, there is little that can be done besides cutting the tag as short as possible. This should be tony with fine scissors so that the tag is not left too long and the stitches are not cut accidently.

For tags that are sewn on with a different line of stitching from the seam, there are more options available. The tag can be cut away from the t-shirt by using a seam ripper. This small device will pull the stitches out of the shirt quickly and efficiently. If you don’t have a seam ripper, however, there are other options. To get the tag to fall away from the shirt, you might cut one or more of the stitches holding it on and then try to pull the thread to pull out the rest of the stitches. You may need to push and pull the thread a few times to do this, but it can be done with many items. Tweezers can sometimes be helpful when trying to remove tags with this method.

You can also use a small pair of hair-cutting scissors in place of a seam ripper. The small points at the end of these scissors will enable you to get a blade in between the tag and the thread. The thread can then be simply cut away from the tag, enabling it to be easily removed.

If the tag does have separate stitching from the seam, and the stitching doesn’t look very tight, you might be able to simply rip the tag out of the shirt. This should of course be done only after assessing the tag and making sure that the seam will not be affected. If it doesn’t work, it may loosen up the thread so that it’s easier to cut it away from the tag. If you do try pulling the tag out, pay attention to how it is affecting the garment. If it looks like the neck is being stretched out, stop pulling and try another method.

How to Remove Ring-Around-the-Collar from Your T-Shirts

There are certain things that are just extra difficult to clean when it comes to laundry. One of those involves T-shirts and is referred to as ring-around-the-collar. It is a stain created usually by the sweat of the neck coming into contact with the collar area of the T-shirt. Unfortunately, sweat stains most T-shirt fabrics, leaving an oily, organic stain that is difficult to clean. However there is still hope. You can get it clean and there are even a couple of different ways to do so.

Method #1
Use an old toothbrush to apply degreaser to the collar area of the T-shirt. Gently rub in the degreaser. Put the T-shirts in cool water in the washer with oxygenated detergent afterwards. After the shirts agitate a little to ensure that they are covered with water, turn off the washer and let the shirts sit overnight in it. In the morning restart the washer and let the cycle finish.  Check to be sure the stain is completely gone, if not repeat the process. Dry as usual.

Method #2
Purchase a lanolin-based hand cleaner in a hardware store or department store. This is the type of cleaners that mechanics use to clean oil and grease from their hands. Apply it to the collar of the T-shirt and let it sit for a few minutes. Wash the shirts as usual. If the stain is not completely gone, reapply lanolin cleaner and rub gently, then rewash the T-shirt.

Method #3
For white T-shirts, make a paste using dishwasher detergent and hot water. Then apply to the collar and let it soak for a while. Wash as usual. This is not for use on colored T-shirts as it will bleach them.

Method #4
It is important to properly pre-treat ring around the collar before laundering your T-shirts. In a spray bottle mix together 2 parts household ammonia, 2 parts water and one part mild liquid detergent. Spray the mixture on the affected collar and gently rub it in using a towel or a soft brush. Let it sit for a few minutes and then wash as usual. If a yellow mark is left you will need to remove it with bleach. This is another method that works best on white T-shirts.

Method #5
Pre-treat the collar of the T-shirt with shampoo, a grease-fighting dish detergent, lemon juice or white vinegar. Gently rub it into the stain, let sit for a while and then wash in the warmest temperature recommended for the shirt.

Before you do any of these methods do a spot check on a hidden part of the shirt to make sure the treatment method is safe for the fabric.

Another way to deal with really bad ring around the collar is to use the T-shirt for cleaning purposes and buy some new ones. Get brand new custom-made T-shirts in any design you wish and remember to pre-treat the collar with a laundry pre-treatment before washing to avoid bad cases of ring around the collar.

Get a new custom-made T-shirt today and eliminate any ring-around-the-collar worries, at least for a while.

How to Remove Deodorant Stains from the Underarms of Black T-Shirts

There is nothing quite as noticeable and embarrassing as underarm deodorant stains on a black T-shirt. It always seems to happen when we are in a rush or going somewhere special or with your absolute favorite black T-shirt. To make things worse, it’s not easy to remove such stains and you need to pay particular attention when laundering the item. Below you will find some tips on making sure you get rid of those annoying marks. There are also some emergency tips to get rid of them when you have nothing to change into or have already left home before you realize that you have deodorant streaks.

When washing your black T-shirt, follow these great tips to get rid of deodorant stains.

Option #1
Put ammonia on a cloth or paper towel and apply it to the stain as a treatment to remove the white deodorant stain. Wash as usual. Be careful not to inhale the ammonia.

Option #2
Apply enzyme activated laundry detergent to the stain and let it sit for a while, before laundering the T-shirt in more of the same detergent.

Option #3
Remove the T-shirt as soon as possible to clean it. Pre-treat the area with a commercially made stain treatment or a mixture of liquid laundry detergent and water and gently rub the area. Wash the shirt in the hottest water possible.

Option #4
The environmentally friendly way to remove deodorant stains from black T-shirts is with salt. Wet the area with the stain and pour some table salt on it, rub it into the stain to erase it. Then add a little extra salt to the wash water and wash the shirt as usual. A pricier version, but still environmentally friendly, is to use vodka as a pre-treatment on deodorant stains and rub it in a little. If the stain has been there a while, you may need to let the vodka sit on it for a couple of hours. Wash as usual.

If you need the stain off now because you want to wear the black T-shirt, there is an immediate fix to the problem. Take a black cotton sock and rub the deodorant stain until it comes out. Sounds too easy to be true. Try it and see. Turning the T-shirt inside out and rubbing the deodorant stain with the inside of the fabric will usually remove the stain too. Do not try removing the stain with water and paper towels, because this only leads to disaster. Little white fibers will be stuck to your black shirt from the paper towel and when the water dries the stain will still be there.

So now that you have the inside edge on getting rid of those nasty white streaks that deodorant can leave on your favorite black T-shirt, you are ready to start wearing it every chance you get. Get yourself some new custom-made black T-shirts too, because they are always in style. Then wear them confidently knowing that your deodorant is not ruining your look.

How to Get Beer Stains Out of T-Shirts

Got beer stains on your favorite T-shirt? What’s a beer lover to do? There are many different recommended ways however some of my personal favorites involve not removing it at all. You can make a note in fabric paint about where you were/what you were doing when you got your beer stain. Wash it as usual without treating the beer stain and then use the tee as your official beer-drinking shirt. You can even mark future beer stains similarly until your T-shirt becomes a souvenir of many a party. If you are serious about removing beer stains though, two popular methods are outlined below.

Technique #1

If you really do want to remove beer stains from your T-shirt, here is one method of how to do so. As soon as possible after the spill occurs, remove the shirt. Rinse it thoroughly with cold water from the inside of the shirt, to remove as much of the stain as possible. Then make a mixture of liquid laundry detergent and cold water and apply it to the beer stain for a minimum of 5 minutes, then rinse. If the stain is still visible, make a mixture of 1 part vinegar with 2 parts of water and apply that to it carefully. Rinse it out immediately because if not, the vinegar will bleach the shirt. Wash as usual, according to the instructions on the tag of the T-shirt.

Technique #2

Another highly recommended method also involves vinegar. Rinse the shirt in cold water as soon as possible after the stain occurs and keep the shirt wet until the stain is gone or you may inadvertently let it set in. Mix together a stain treatment that consists of 2 cups of cold water, 2 tablespoons of white vinegar and 1 teaspoon of dishwashing detergent. The key is choosing the right dishwashing detergent; make sure it is clear or white in color, has no bleach, perfumes, or moisturizers. Lightly apply the mixture to the stain with a white or light-colored cloth. Do not rub it in, as the rubbing action may damage the fabric. Wash as usual. This mixture is a great pre-treatment for most food and beverage stains.

In reality, beer is a relatively easy stain to remove. However, it can be more difficult if it is one of the darker beers, because there is more pigment to remove. Here are some additional beer stain removal tips to keep in mind. You should definitely not use hot water when attempting to remove a beer stain as it will instead cause the stain to set in. Using bar soap also makes it more difficult to remove beer stains, so stick with liquid detergents. Be patient but act quickly and use one of the two techniques described above and in no time, your favorite T-shirt will be beer stain free.

Better yet, get yourself a custom-made T-shirt and have it printed with something fun like “My official beer drinking shirt,” “Ask me where I got these beer stains,” or “Like my clean shirt? Ask me how to remove beer stains.”

5 Ways to Remove Wrinkles From Your T-Shirt Without Ironing

If you are anything like me and hate ironing you will love these tips on getting the wrinkles out of your t-shirt.

1. Make your own wrinkle release spray. This mixture is easy to bring along on a trip where you don’t have access to an iron. Just mix together 1 tsp of liquid fabric softener and 1 cup of water (preferably distilled water) and put it in a spray bottle. Spray your wrinkled t-shirt and pull the item to smooth it. Let your t-shirt dry my either hanging it or laying it flag. If you don’t have much time you can blow dry your clothing dry (if you have access to a hair dryer). Remember if you are traveling don’t pack more than 3 ounces or you might not be able to bring it on the airplane due to current security laws.

2. Put your T-shirt in the Dryer. If you want a quick an easy way to get the wrinkles out of your t-shirt just throw your shirt and a damp towel in the dryer for about 10-15 minutes and when its done your shirt will not only lose its wrinkles but it will be nice and warm and toasty on your body.

3. Shower De-Wrinking. You can also hang your t-shirt in the bathroom when you are taking a shower. The steam and humidity will help remove the wrinkles. Once again you can also use the hair dryer to smooth out any additional wrinkles.

4. 70% Rubbing Alcohol. You can put rubbing alcohol on your t-shirt using the same method as the wrinkle release spray and it can remove the wrinkles.

5. Water and a Hair Dryer. You can wet the wrinkled areas of your t-shirt or even the entire thing and dry it fairly fast using a hair dryer.

These five methods are best when your t-shirt is a cotton blend such as a 50-50 cotton/polyester blend. Try these methods before getting out the dreaded iron.

For more ideas and tips visit Lifehacker and Tipnut

How to Make a T-Shirt Quilt

Preserving memories involve more than just scrapbooks these days. T-shirt quilts are becoming a popular way to commemorate a childhood, concert-going days, or even a loved one who has passed.

Everyone has t-shirts they just cannot bear to toss in the trash. With t-shirt quilts, you can use that old football jersey, Van Halen t-shirt, and even sweet baby onesies to create a special, durable quilt that you can cherish for years to come. These quilt creations make wonderful gifts and keepsakes for children, adults, friends, or family members.

So you have the t-shirts, but you don’t know what to do in order to go from stack of old shirts to amazing quilt? Even a beginning quilt-maker can succeed at this project with a little guidance. The following will help you to learn how to make a t-shirt quilt. The first step is to make sure you can cut the same size square out of each t-shirt you want to use. Identify the best section of each shirt and decide how you can crop so each square is the same size and in a perfect square shape. The size of the square and number of t-shirts used determines how large your quilt will be. You can go as small as a lap quilt to as large as a covering for a king size bed! Use as few as four t-shirts or as many as 36.

Next you will need to focus on the interfacing—the material that provides the backing and structure for the quilt. Interfacing helps the quilt to keep its shape. You can choose between woven or non-woven type and between light through medium weight material. A fabric store can help you to find exactly what you need. You will want to cut the interfacing material slightly larger than the t-shirt blocks in order to make the seams as sturdy as they can be. Then you will fuse the interfacing to the t-shirt sections, following the instructions that come from the interfacing manufacturer.

You may choose to simply sew the t-shirts together or you may choose to use additional material for sashing and borders around each t-shirt square. The sashing and borders can provide a contrast and attractive way to divide the different t-shirt squares, but they are optional. Remember to wash the t-shirts, interfacing material, and sashing before sewing, so the colors do not bleed or spread.

The fun part is arranging the blocks and deciding the layout for your quilt. Find a large, clear space to lay down each square and play around with different layouts until you come up with the perfect look.

Finally, the sewing begins! Choose to sew either horizontally or vertically and, if you are adding sashing pieces, sew those in as you work. Sew the rows together and then add the border. The finishing touch is to layer the t-shirt quilt with backing and/or batting. Tape or pin the pieces together and either use a quilting machine or tie the layers together. Wrap it all up by binding, which holds the edges together and gives your quilt a polished look.

T-Shirt quilting is a fun, relatively easy way to use your beloved Ts. The finished product will be something in which you can take pride. But, beware—you may find friends and family asking you to take-on their t-shirt quilting projects once they see your unique masterpiece!

How Make a Vintage Looking T-Shirt at Home

There is a better way to create the ultimate vintage looking T-shirt, without paying outrageous prices for a cotton blend shirt that’s faded juuuuust right. With a little more time and a lot less money, you can achieve this look at home. Just follow these instructions:

Follow these steps to make your t-shirt look aged or vintage:

1. Soak your T-shirt in a solution of 8 cups water and 1 ½ cups of salt for around 3 days. To make the solution, bring the water to a boil and slowly stir in the salt. Remember to let the mixture cool off before adding your shirt, or the shirt may shrink.

2. After the 3 days are up, wring out your T-shirt and rub down both the inside and outside briefly with a super fine grit sandpaper. Go easy over any designs, silkscreening or iron-ons–the paper will take them right off.

3. Hang your shirt out to dry and fade in the sunshine.

4. Rinse the shirt quickly and wring it out in your sink.

5. Wash your shirt in the washer and dry in the dryer and you normally would.

A soft, perfectly aged T-shirt should emerge. If you have any other tips on how to create a vintage t-shirt we would love to hear them.